
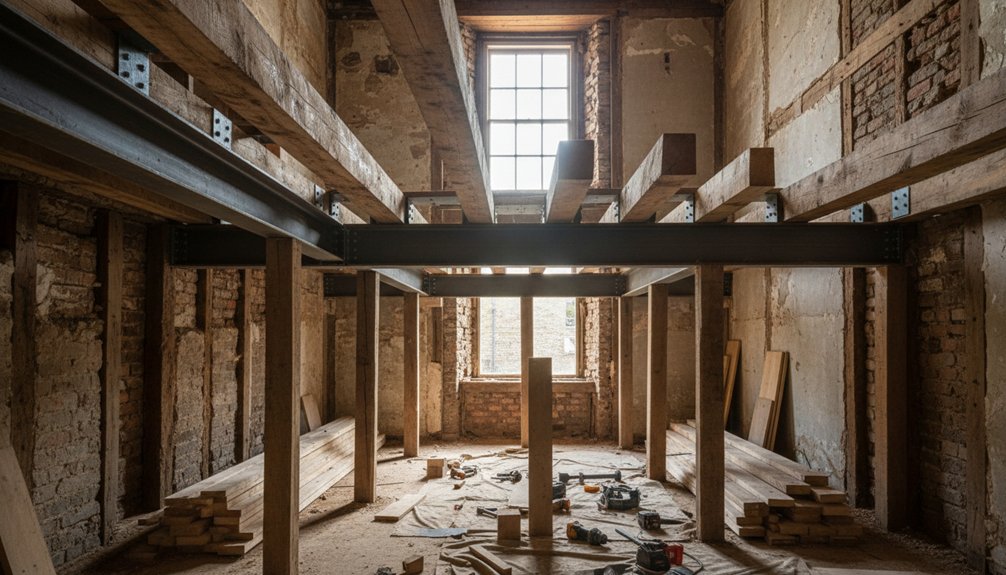
As you lift an old floorboard, you may hear decades of movement in every creak and feel the structure give slightly underfoot. Before your renovation changes load paths, inspect joists and subflooring for sagging, rot, insect damage, and moisture. You’ll need to distinguish repairable defects from conditions requiring an engineer, then plan shoring, sistering, replacement, blocking, or new supports without erasing sound historic fabric. The right approach begins below the finished floor.
Key Takeaways
- Inspect joists, floors, bearings, moisture levels, insect damage, alterations, spans, spacing, and visible deflection before renovation.
- Correct leaks, drainage problems, damp masonry, poor ventilation, rot, and pest activity before reinforcing or enclosing the floor.
- Sister sound joists with properly sized, securely fastened members when existing timber remains structurally suitable and sufficiently dry.
- Replace joists with severe deterioration, distortion, inadequate bearing, or major strength loss, maintaining temporary support during work.
- Add blocking, beams, posts, or perpendicular supports to distribute heavy loads, align with foundations, and preserve historic framing.
Inspect Floors and Joists Before Renovation
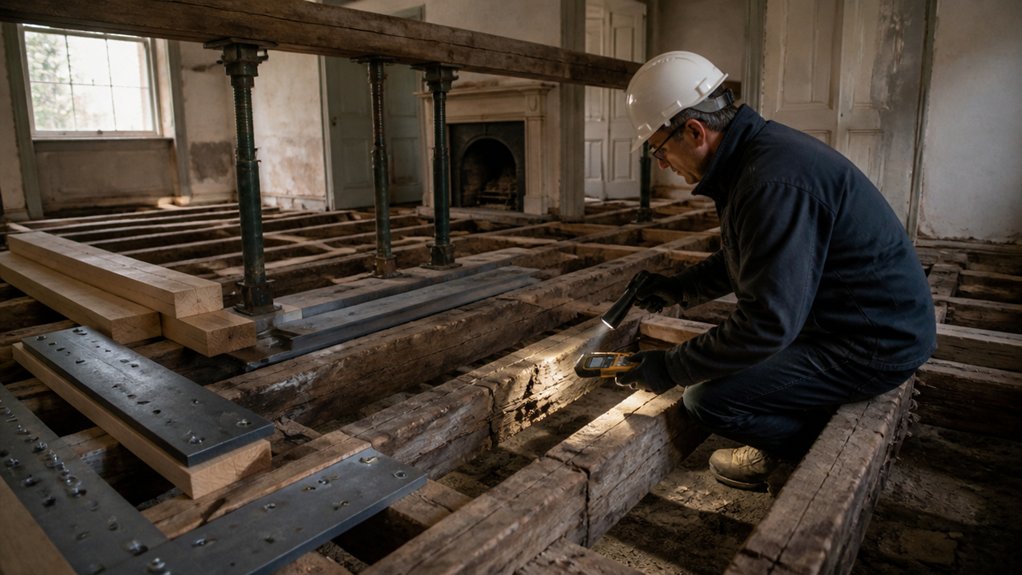
Before renovating an older property, inspect the floors and joists to identify structural weakness, moisture damage, insect activity, and alterations that may have reduced their capacity. Start in accessible areas, including basements, crawlspaces, and rooms with removed finishes.
Record joist dimensions, spacing, spans, bearing points, and visible deflection, then compare them with the proposed loads. Check whether previous owners cut, drilled, notched, or relocated members for plumbing, wiring, or heating.
Use a moisture meter and probe only where necessary, preserving historic fabric and avoiding unnecessary removal. Review original drawings, alteration records, and local construction requirements.
Plan floor insulation around ventilation and moisture control, not merely thermal performance. Finally, assess how reinforcement will affect retained aesthetic flooring, thresholds, skirtings, and future access before selecting an engineer-approved repair strategy.
Spot Sagging, Rot, and Insect Damage
You’ll identify structural sagging by checking floor levels, springy areas, cracked finishes, and uneven door openings.
Probe exposed joists and boards for soft spots, discoloration, fungal decay, and insect galleries, while recognizing that concealed damage may require limited opening-up.
Document each finding before repairs so you can retain sound historic fabric and address the underlying moisture or pest source.
Identify Structural Sagging
Start by inspecting the floor for localized dips, springy areas, or uneven shifts, which can indicate spot sagging rather than uniform settlement. Sight along skirting boards, thresholds, and joist lines, then use a straightedge and level to map changes. Record each dip’s location, depth, and direction, because patterns can reveal overstressed joists, altered partitions, or removed supports.
Check whether doors bind or cracks widen at junctions, but don’t assume every irregularity signals structural failure; older buildings often contain deliberate tolerances and long-settled movement. Measure floor deflection under normal, controlled loading, never exceeding safe limits. Compare readings with the span, joist dimensions, spacing, and historic construction.
A qualified engineer should complete the load assessment before you add finishes, redistribute rooms, or install reinforcement. Photograph findings and retain records to guide minimally invasive repairs.
Detect Rot and Insect Damage
Where does a springy or sagging area meet damp masonry, plumbing, or poorly ventilated voids? Inspect there first for rot and insect damage. Probe joists and boards with an awl; sound timber resists, while decayed wood feels soft, fibrous, or hollow.
Look for dark staining, fungal growth, beetle exit holes, frass, and fresh dust beneath surfaces. Trace moisture to leaking pipes, defective gutters, or ground contact, and record affected members before removing finishes.
Don’t conceal damage with strengthening plates: isolate the cause and have a conservation professional assess load-bearing timber. Retain repairable historic fabric, cutting back only to sound wood.
Specify compatible Wood treatment after moisture control, not as a substitute for repairs. Improve airflow, seal unnecessary openings, and maintain dry conditions as long-term Pest prevention.
Keep temporary supports in place until the structure is cleared.
Decide When Repairs Need an Engineer
When floor deflection, widespread joist damage, altered load paths, or removed bearing walls are involved, consult a structural engineer before disturbing the existing fabric. An engineer can complete a safety assessment, trace how loads travel through historic walls and floors, and identify hidden risks that a visual inspection may miss.
You should also seek advice when cracks are progressive, supports appear unstable, moisture has weakened structural timber, or proposed work will add significant weight. Provide measured drawings, photographs, previous alterations, and any records of movement to make the inspection efficient.
Ask for recommendations that retain sound original material wherever possible, rather than defaulting to wholesale removal. Early professional input often produces cost-effective solutions, prevents avoidable damage, and helps you document decisions for building control and future conservation work.
Choose Sistering or Joist Replacement
Choose sistering when the original joist remains substantially sound and its bearing, alignment, and moisture conditions can be verified. Joist sistering lets you retain historic fabric while adding a new, properly sized member alongside the existing one. Remove damaged material, correct the moisture source, and secure the sisters according to the engineer’s fastening and bearing details.
Don’t conceal decay, insect damage, or inadequate support behind new timber.
Choose Joist replacement when deterioration compromises the original member’s strength, geometry, or end bearing, or when access allows careful removal without harming significant finishes. Match the existing species, dimensions, and moisture content where feasible, but don’t reproduce defects that caused failure.
Document each removed joist, preserve salvageable material, and sequence work so temporary support protects ceilings, floors, and adjacent masonry during the transition.
Add Blocking, Beams, or Posts Where Needed
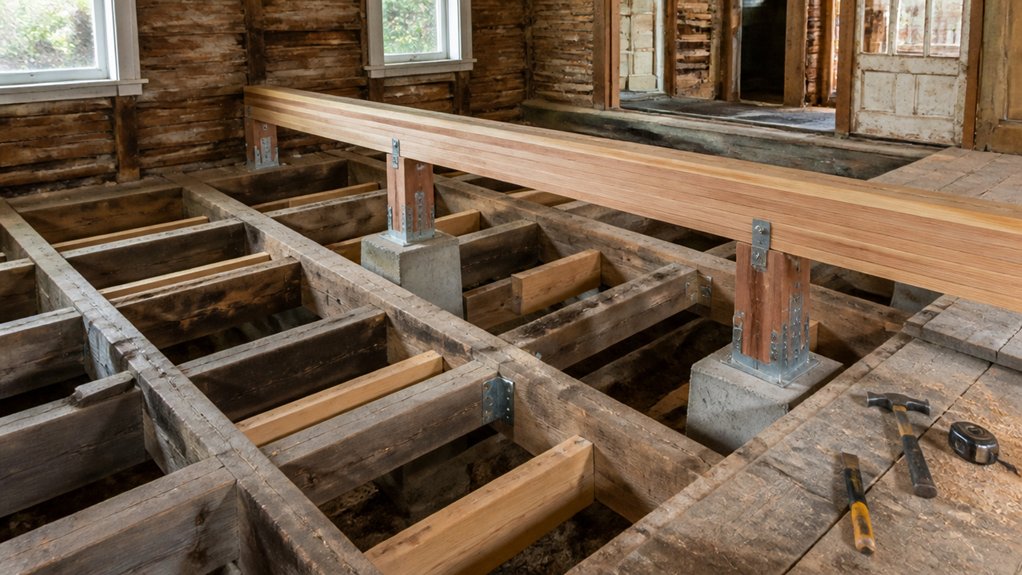
Add blocking between joists to limit twisting, distribute loads, and preserve the existing framing.
Where spans or deflection require more capacity, install support beams and posts with properly sized connections and adequate bearing.
You’ll need to align new supports with the foundation or other load paths while minimizing disturbance to historic materials.
Install Strategic Blocking
Strategic blocking can stiffen an older floor system and distribute loads without unnecessarily altering historic materials. First, inspect joist spacing, span, deflection, and existing connections.
Install solid blocking between joists at midspan or beneath concentrated loads to limit twisting and improve load distribution. Stagger joints where possible, and fasten each block securely with compatible screws or nails without splitting aged timber.
Base material selection on the existing framing: matching or structurally compatible lumber usually performs better than dissimilar, moisture-sensitive stock. Where historic wood remains sound, avoid unnecessary cutting, notching, or removal.
Fit blocks tightly, but don’t force them against irregular masonry or distort the floor plane. Coordinate locations with plumbing, wiring, insulation, and ventilation.
Finally, verify that blocking addresses observed movement, rather than treating it as a substitute for correcting moisture damage or inadequate bearing.
Add Support Beams and Posts
When existing joists can’t safely carry their span or concentrated loads, install a properly sized support beam, posts, or additional blocking based on verified structural conditions. Have a structural engineer assess load paths, bearing capacity, settlement, and connections before beginning support beam installation.
Whenever possible, preserve sound historic framing rather than replacing it unnecessarily. Set beams on continuous, stable bearings, such as reinforced masonry pockets or properly designed posts with footings; don’t rely on loose shims, weak partitions, or unverified foundations.
Align posts directly beneath beam ends and avoid transferring loads onto unsupported floorboards or ceilings. For post reinforcement, repair decay, add concealed steel or sister members when appropriate, and protect vulnerable wood from moisture.
Provide temporary shoring during work, then inspect connections, levelness, and deflection after loading. Document every intervention for future repairs.
Support Floors Under Tubs, Tile, and Islands

Heavy tubs, tile assemblies, and kitchen islands can exceed the floor loads an older structure was designed to carry, so assess the joists, subfloor, and bearing points before installation. Map each load and confirm that framing transfers weight to sound walls, beams, or foundations.
For floor reinforcement, sister undersized joists with matching, properly connected members, or add blocking to distribute concentrated loads. Under a tub, place supports perpendicular to the joists where possible, and provide a rigid, level platform without removing historic framing unnecessarily.
Tile requires a stiff, well-fastened subfloor; use an approved underlayment system and respect finished-floor elevations at doors and fixtures.
For islands, support cabinet legs or feet directly over framing, using support techniques that spread loads across multiple joists.
Have an engineer verify unusual spans, settlement, or damaged wood before covering the work.
Fix Moisture Problems Before Closing Floors
Before closing a reinforced floor, identify and correct moisture sources that could decay joists, subflooring, or historic finishes. Trace leaks from plumbing, roofs, exterior walls, and ground contact; don’t conceal damp framing beneath new layers. Measure wood moisture content and investigate staining, odors, softened fibers, or insect activity.
Repair leaks, improve grading and drainage, and allow framing to dry before installation. Where appropriate, use compatible Moisture barriers beneath slabs, over crawl-space soil, or around wet areas, but don’t trap moisture inside historic assemblies.
Provide Ventilation improvement through properly sized crawl-space vents or mechanical systems, while avoiding airflow that carries humid outdoor air into a cool cavity.
Replace only irreparably damaged members, matching original dimensions and species when feasible. Document concealed repairs, then close the floor only after readings stabilize within the project’s conservation requirements.
Conclusion
Reinforcing an older floor starts with careful inspection, not guesswork. Address rot, insects, moisture, and weak connections before sistering joists, installing blocking, or adding beams and posts. Support tubs, tile, and islands over sound framing, and use temporary shoring whenever loads change. Remember, wood can lose roughly half its structural capacity when its section is reduced by 20 percent through decay. Preserve serviceable historic fabric, verify load paths, and consult an engineer when conditions exceed your expertise.

