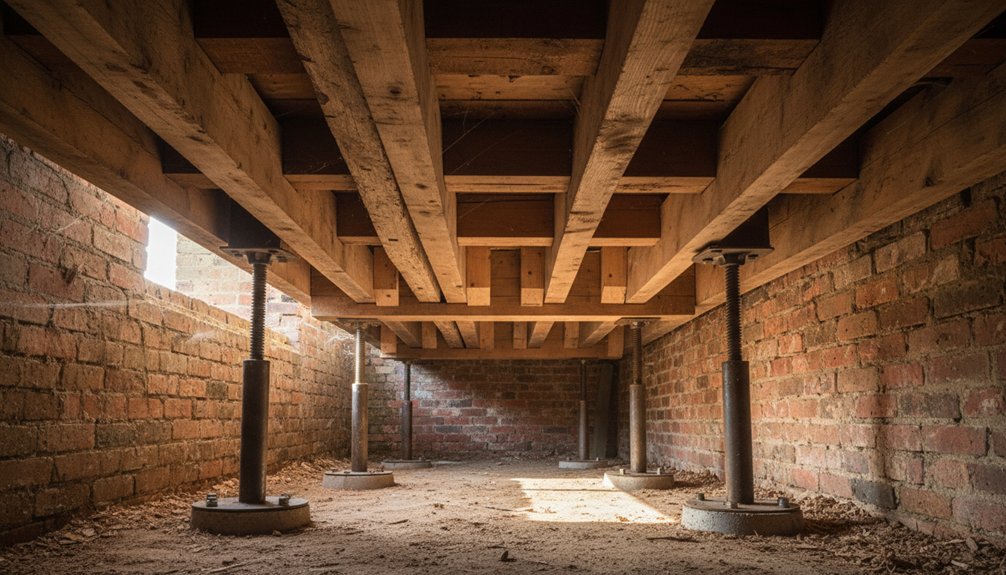
When your Victorian floor joists sag, you need to address more than the visible dip. Start by tracing the cause through the joists, supporting walls, ground conditions, damp levels, and ventilation. You’ll then lift the structure slowly with adjustable props, protect original fabric, and reinforce weakened members with carefully fixed sister timbers. New beams, posts, or foundations may also be necessary—but the correct sequence matters, and a hidden defect can change the entire repair strategy.
Key Takeaways
- Inspect joists, bearings, foundations, services, moisture, and previous alterations to identify the cause and extent of sagging.
- Record existing levels, cracks, slopes, timber damage, and deflection before designing a targeted, minimally invasive repair.
- Lift the floor gradually with adjustable props and broad spreaders, monitoring levels and checking for movement or cracking.
- Reinforce corrected joists with matching sister timbers, concealed steel, solid shims, and reversible staggered fixings bearing on supports.
- Improve ventilation and moisture control, then document repairs and monitor the structure seasonally with appropriate professional guidance.
Find the Cause of Sagging Victorian Joists
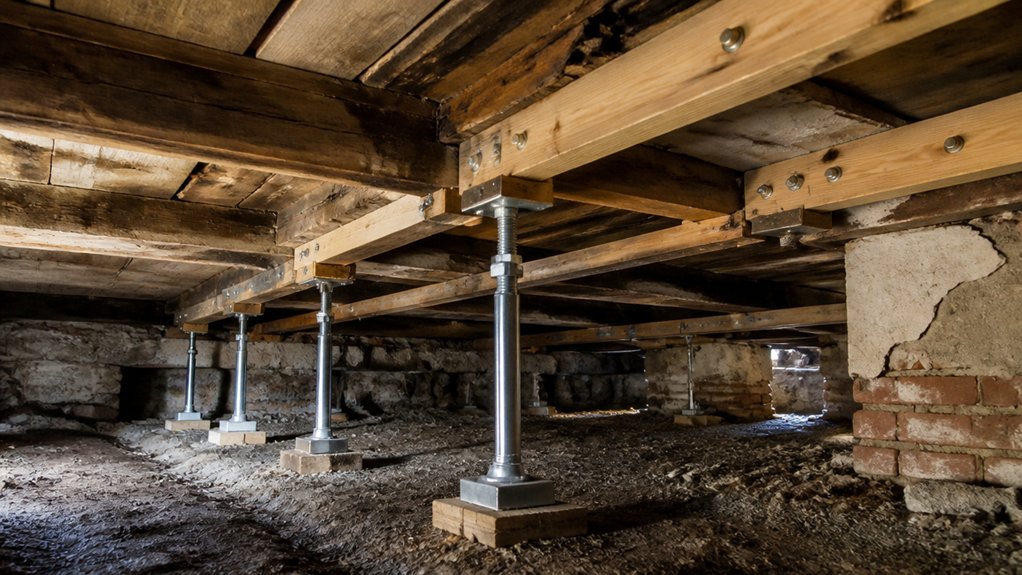
Before you repair a sagging Victorian floor, find out why it has moved. Look for the pattern of deflection, not just its lowest point. Gradual settlement may reflect long-term loading, altered room layouts, or removed partitions.
Localized sagging can point to historic alterations, past water exposure, or poorly executed repairs. Check whether modern plumbing, heating, or heavy finishes changed the floor’s original load path.
You’ll also want to examine timber shrinkage, decay, insect activity, and previous attempts to level the surface. Don’t assume a flat floor suits the building; Victorian craftsmanship often accepted subtle movement within a carefully balanced structure.
Record cracks, slopes, and changes in floor height before deciding on intervention. This measured diagnosis supports historic preservation by protecting sound fabric and addressing the true cause rather than masking symptoms.
Inspect Joists, Walls, and Ground Supports
Once you’ve mapped the floor’s movement, inspect each joist from above and below, noting splits, crushing, rot, insect damage, and excessive notching or drilling. Check bearing pockets for dampness, loose masonry, and crushed ends; Victorian joists often disappear into walls where decay stays hidden.
Trace every support line, confirming that sleeper walls, piers, and foundation ledges remain plumb, stable, and properly seated. Probe suspicious timber with an awl, measure deflection, and photograph findings before disturbing anything.
Look for settlement cracks, water staining, termite galleries, and gaps beneath ground supports. Verify that joists haven’t been cut around pipes or cables, and record their spacing and dimensions.
If floor insulation conceals evidence, lift it carefully and preserve its location. A thorough survey supports Historic preservation while defining safe, accurately targeted work.
Choose Repairs That Protect Period Features
Your survey should guide the least destructive repair that restores strength without erasing historic fabric. Before specifying work, identify which joists, boards, skirtings, and ceiling finishes carry genuine heritage value.
Retain sound original timber whenever possible; clean it, treat local decay, and reinforce it with discreetly sized sister members or concealed steel where calculations justify intervention.
Match replacement timber’s species, grain, dimensions, and moisture content, and use reversible fixings rather than unnecessary adhesives.
Record every alteration so future owners can understand the building’s structural history.
Restoration techniques should respect Victorian aesthetics: preserve tool marks, mouldings, nail patterns, and the visual rhythm of exposed framing.
Avoid wholesale replacement, aggressive planing, and modern finishes that imitate age poorly.
Let your engineer and conservation specialist coordinate details before materials reach the site.
Lift Sagging Joists Gradually and Safely
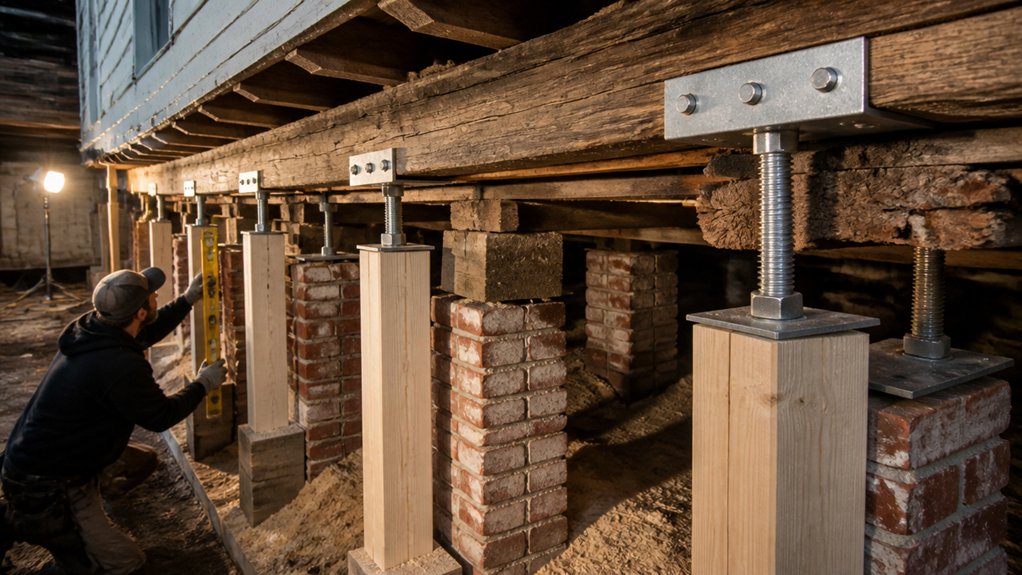
If sagging joists require correction, lift them in small, measured stages rather than forcing them back to level. Set adjustable props beneath sound bearing points, using broad timber spreaders to distribute pressure across the ground or supporting structure.
Place a level, laser, or taut reference line nearby, then raise each prop evenly, stopping regularly to inspect plaster, skirting, fireplaces, and masonry above. Victorian fabric may have settled for generations; historical accuracy means correcting dangerous movement without erasing that character.
Keep records of every adjustment and listen for cracking, splitting, or shifting, which signal that you must stop and reassess.
Protect existing services, vents, and floor insulation before access becomes restricted. Don’t leave hydraulic jacks carrying permanent loads; transfer the corrected position to properly designed, fixed supports, then monitor it through seasonal changes.
Strengthen Joists With Sister Timbers
After the joists have been lifted and stabilised, strengthen them with sister timbers that bear firmly on the same supports at each end. Select straight, seasoned timber matching the original joist depth and width, or use an engineer-specified section where decay or loading demands it.
Cut sisters to achieve full, level contact, then ease them into position without disturbing the corrected floor line. Apply a compatible preservative to vulnerable ends, keeping moisture away from masonry where possible.
Clamp each sister tightly against its neighbour, checking alignment and crown before fixing with staggered structural screws or bolts designed for timber connections. Pack only minor gaps with solid shims; don’t rely on foam or loose wedges.
This careful approach supports Historical preservation while respecting Victorian aesthetics, original workmanship, and future inspection needs.
Add Beams, Posts, or New Foundations
Where sister timbers can’t restore adequate bearing or capacity, add beams, posts, or new foundations to carry the load back to sound ground. Begin by tracing load paths and confirming firm bearing, rather than forcing a historic wall or patched masonry to accept new pressure.
A steel or laminated-timber beam can support several joists, but size it for span, deflection, fire separation, and access.
During Post installation, set adjustable steel or properly treated timber posts on designed pads; don’t rest them on loose soil, thin slabs, or unsupported brickwork.
Foundation reinforcement may require mass-concrete pads, reinforced concrete bases, or carefully toothed masonry that matches the building’s fabric.
Jack the beam gradually, monitoring levels and cracking, then pack permanent bearings tightly.
Keep every connection inspectable, documented, and reversible where practical.
Control Damp and Ventilation Under the Floor
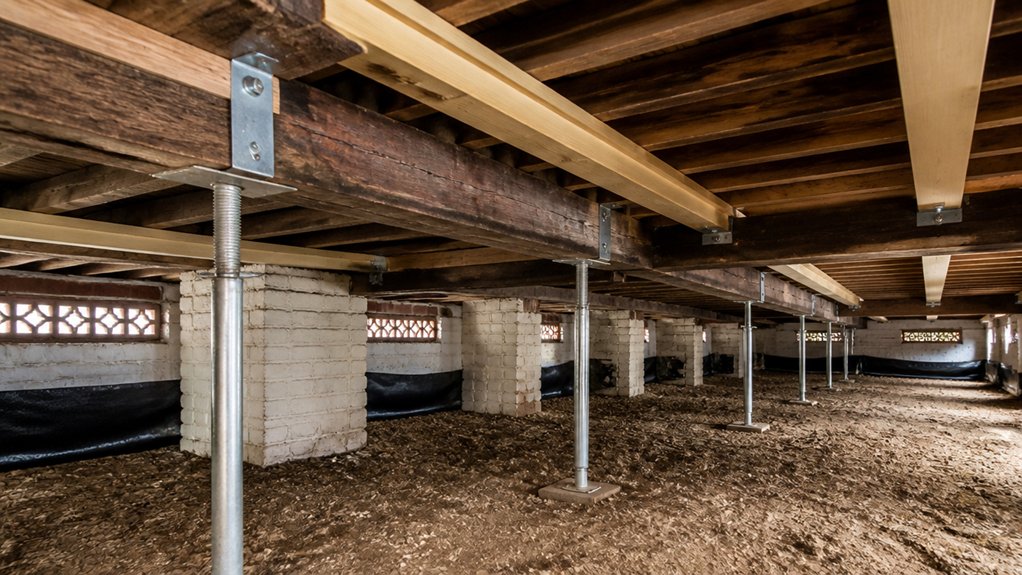
Once your supports stand true, you’ll need to control damp beneath the floor to protect the repaired joists and historic fabric.
Improve subfloor airflow with clear vents and unobstructed paths, while sealing exposed soil against ground moisture.
Install effective ventilation that suits the building’s original construction without compromising its structural character.
Improve Subfloor Airflow
How well does air move beneath your floor? In a Victorian house, sound ventilation protects joists, boards, and historic fabric from stagnant, humid air. Start by mapping existing vents, noting blocked grilles, buried openings, and areas where later alterations interrupt the cross-flow.
Check air vent placement on opposing walls so fresh air can travel beneath the full floor, rather than serving one isolated bay. Clear masonry vents carefully, retaining original brickwork and replacing damaged grilles with suitably sized, corrosion-resistant units.
If you’re fitting underfloor insulation, leave a continuous ventilation path between insulation and boards, and don’t cover vents or press material against joists. Use discreet ducting only where necessary, and keep access clear for inspection.
Good airflow supports your repairs; it doesn’t replace accurate joist assessment or careful detailing.
Prevent Ground Moisture
Ground moisture can undo sound joist repairs by keeping the underfloor void persistently damp. Before you close the floor, inspect the earth, brickwork, and joist ends for moisture paths. Remove standing water and correct leaks, but don’t bury damp masonry beneath impermeable coatings; Victorian walls need compatible, breathable treatment.
Where the ground remains exposed, lay a durable membrane or slab system specified for the building’s conditions, turning laps up at edges and sealing penetrations carefully. Use vapor barriers only where their location suits the floor build-up and moisture movement; a misplaced barrier can trap condensation against old timber.
Keep soil below timber clearances, and isolate repaired joists from wet masonry with suitable, non-absorbent bearings. Record every layer, so future work won’t compromise the structure or conceal renewed damp.
Install Effective Ventilation
Good ventilation keeps the underfloor void dry without chilling the structure or driving damp into repaired timber. You’ll need a clear air path between opposing external walls, so check that existing airbricks aren’t blocked by soil, insulation, or debris.
Replace damaged units with sympathetic, terracotta-style vents, keeping their openings above finished ground and below the suspended floor. Where original ventilation proves inadequate, add discreet vents only after evaluating joist layout, masonry strength, and local weather exposure.
Use ventilation techniques that promote cross-flow rather than concentrated draughts beneath newly repaired areas. Fit insect mesh without reducing the free area, and don’t seal vents during winter unless a specialist directs you.
Effective moisture control also depends on maintaining gutters, downpipes, and ground falls. After installation, monitor timber moisture and inspect seasonally for condensation, staining, or renewed decay.
Know When to Call a Structural Engineer
When a damaged floor joist affects a load-bearing wall, spans a large opening, or shows extensive rot, splitting, or sagging, call a structural engineer before you begin repairs. You’ll need a professional to trace load paths, verify bearing conditions, and specify temporary shoring before you lift or sister timber.
Seek advice, too, when previous alterations, notched beams, masonry settlement, or concealed water damage complicate the frame. An engineer can distinguish cosmetic deflection from structural failure and calculate suitable joist sizes, connections, and support points.
Share your preservation goals early; a thoughtful design can protect original fabric while meeting current safety requirements. That balance supports Historical preservation and aesthetic restoration without disguising dangerous movement.
Keep photographs, measurements, and repair records for your engineer and future craftspeople. Don’t cut, jack, or remove a joist on guesswork.
Conclusion
Your Victorian floor can stand tall again when you treat its sag as a message, not a mystery. Trace the cause, lift slowly, and reinforce with sympathetic craftsmanship that respects every original board and beam. Sister timbers, sound supports, dry air, and careful monitoring form the quiet framework beneath lasting repairs. Don’t gamble with hidden movement or damp: call a structural engineer when the floor’s story exceeds your tools, ensuring safety without erasing its character.