

Restoring a British period home asks you to balance practical improvements with respect for what has survived. Before you alter a room, you’ll need to identify original materials, record existing finishes, and distinguish age from damage. Gentle cleaning, careful repairs, and discreet modern services can preserve character without sacrificing comfort. From the entrance hall to the bathroom, each space presents different decisions—and the first one often determines how successfully the rest of the house comes together.
Key Takeaways
- Survey each room’s proportions, materials, circulation, and historic features before planning repairs or modern improvements.
- Preserve original floors, plasterwork, fireplaces, doors, joinery, tiles, and decorative details through compatible, discreet repairs.
- Clean surfaces gently, test methods first, and retain patina, wear, tool marks, and historic paint layers wherever possible.
- Modernize heating, wiring, ventilation, and plumbing discreetly, using existing voids and period-appropriate fixtures without damaging historic fabric.
- Restore rooms individually, prioritizing entrance halls, living rooms, and fireplaces while balancing safety, comfort, budget, and authentic character.
Plan Your Period Home Restoration

Planning a period home restoration starts with understanding what makes the property historically significant. Begin by researching its construction date, architectural style, local materials, and later alterations. Check old photographs, sales particulars, maps, and archives to identify original layouts and lost features.
Then survey each room, recording proportions, circulation, fireplaces, joinery, lighting, and surviving decorative details. Set priorities according to historical value, condition, safety, and your budget, while distinguishing essential repairs from sympathetic improvements.
Consider how modern living will fit without overwhelming the building’s character. Thoughtful furniture arrangement should respect room scale, axial views, and traditional functions, rather than forcing contemporary habits into unsuitable spaces.
Select window treatments that complement period proportions, such as understated curtains, shutters, or blinds. Finally, consult conservation specialists before committing to major changes.
Protect Historic Surfaces Before Renovation
Before work begins, you’ll assess plaster, timber, stone, tiles, and paint for age, condition, and historic value.
You’ll shield floors and walls with breathable, non-abrasive coverings that won’t trap moisture or mark fragile surfaces.
Where possible, you’ll preserve original finishes rather than replacing them, recording details before any intervention.
Assess Existing Surfaces
Start by examining every surface before you disturb it, noting original plaster, limewash, timber, stone, tiles, paint layers, and signs of earlier repairs. Record each room’s condition with dated photographs and measured notes, distinguishing historic fabric from later additions.
Look closely for cracking, damp staining, salt deposits, blistering, woodworm, loose tiles, and hollow-sounding plaster, but don’t assume every blemish requires removal. Surface textures often reveal traditional workmanship, including hand-finished plaster or historically significant brush marks.
Test discreetly, where necessary, to identify paint composition, moisture movement, and previous coatings. Consult a conservation specialist before treating uncertain materials, especially where lead paint, asbestos, or fragile decorative work may exist.
Choose repairs according to Material compatibility, ensuring new lime, timber, stone, and finishes can work safely with the building’s existing structure.
Shield Floors And Walls
Once you’ve recorded each surface, protect it from dust, impact, and moisture before renovation begins. Lay breathable, non-slip floor coverings, securing joints without adhesive on vulnerable boards, encaustic tiles, or stone. Use padded sheets at thresholds and stairs, where dropped tools cause lasting damage.
For walls, install temporary, freestanding barriers rather than taping directly to limewash, distemper, or fragile plaster. Respect Historical wall techniques: lime plaster needs airflow, while wattle-and-daub can bruise or crumble under pressure.
Choose traditional shielding materials where practical, including cotton dustsheets, soft felt, and timber battens, but guarantee they’re clean and dry. Seal work zones with zippered partitions, maintain gentle ventilation, and keep water, solvents, and rubble away.
Check protection daily, replacing damp or torn coverings promptly, and brief every tradesperson before work starts.
Preserve Original Finishes
Where original finishes survive, treat them as evidence of the building’s history rather than obstacles to modernisation. Before renovating, photograph each surface, record its location, and consult a conservation specialist where layers or materials seem significant.
Don’t strip paint, varnish, wallpaper, or limewash simply to create a uniform appearance; gentle cleaning and discreet repairs may reveal more character than replacement. Protect decorative moldings, panelled doors, stair rails, encaustic tiles, and surviving hardware with breathable coverings during dusty work.
Test any cleaning method in an inconspicuous area, since aggressive solvents can erase historic colour and patina. Coordinate trades carefully, especially when furniture restoration or rewiring involves moving original fixtures.
Where loss is unavoidable, retain samples and document the change. Your aim is a legible, usable home that still communicates its craftsmanship and age.
Upgrade Heating, Lighting, and Wiring Carefully
You’ll preserve original light fittings where possible, keeping their historic character while updating them safely.
Conceal modern wiring through carefully planned routes that minimise damage to period fabric.
Choose efficient heating systems that improve comfort without overwhelming the room’s traditional proportions.
Preserve Original Light Fittings
How can you modernise a period home’s electrics without losing its character? Start by evaluating every original fitting before replacing it. A Victorian pendant, Edwardian wall sconce, or Arts and Crafts shade may reveal the room’s date and craftsmanship. Photograph each piece, note its position, and ask a qualified electrician to test its condition.
Don’t discard sound brass, porcelain, or opaline glass merely because the wiring has aged; careful electrical renewal can preserve the visible fitting. Choose historically appropriate components, including braided flex, reproduction switches, and lamps with a warm colour temperature, where safety standards allow.
Vintage lighting should complement, not imitate, the architecture. For damaged pieces, commission sympathetic fixture restoration, retaining tool marks, patina, and original proportions. Replace missing shades with period examples or accurately made reproductions, and avoid oversized modern fixtures that distort the room’s character.
Conceal Modern Wiring
When upgrading a period home’s electrics, plan the cable routes before opening walls, floors, or ceilings. Trace existing voids, service ducts, and later alterations, then use them for hidden wiring wherever possible. A qualified electrician can lift floorboards carefully, route cables along joists, and reinstate boards with matching fixings.
Keep chases narrow and position them in later plaster or mortar joints, never through decorative panelling, cornices, or historic masonry without specialist advice. Conceal sockets behind furniture only when access remains safe; otherwise, choose discreet plates in finishes sympathetic to the room’s age.
Photograph every route before closing surfaces, and label circuits clearly for future repairs. Modern electrical upgrades should improve safety without erasing evidence of the house’s evolution.
Secure listed-building consent where required, and retain original fittings whenever they can be safely adapted.
Install Efficient Heating Systems
Start with the building’s fabric and existing heat-loss patterns before selecting new equipment. Check roof voids, suspended floors, sash windows, and chimneys, remembering that breathable construction needs sympathetic upgrades rather than sealed, impermeable treatments.
Insulate discreetly where appropriate, repair draughts around openings, and balance radiators so you’re not overheating some rooms while neglecting others.
Choose a high-efficiency boiler or heat pump only after evaluating the property’s heat demand, electrical capacity, and emitter compatibility.
Slim radiators can echo historic profiles, while underfloor heating may suit a renewed kitchen or later extension; avoid disturbing original encaustic tiles, boards, or plaster.
Use Smart thermostats to control zones without adding conspicuous hardware, but position sensors carefully.
Retain fireplaces as architectural features, and ensure ventilation remains adequate after improving airtightness.
Restore the Entrance Hall’s Original Character
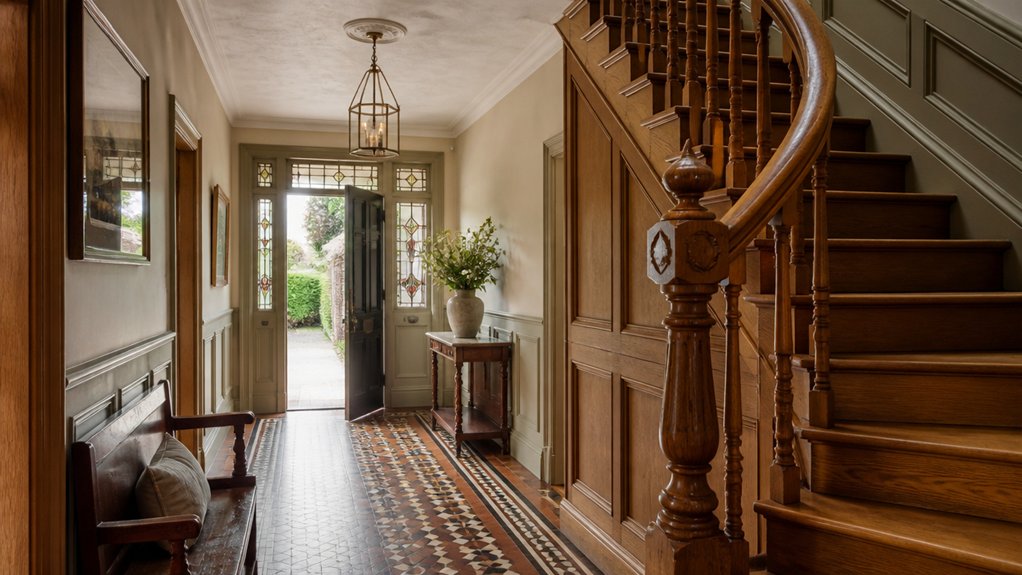
Restoring an entrance hall’s original character begins with identifying what’s genuinely historic before making changes. Examine paint layers, skirting boards, architraves, stair balustrades, and floor surfaces, recording evidence before you clean or strip anything.
Your survey may reveal encaustic tiles beneath vinyl, a surviving dado line, or joinery altered by earlier owners. Prioritise original woodwork preservation: repair cracks, splice damaged sections with matching timber, and use breathable finishes rather than removing patina.
Treat entrance hall lighting discreetly, retaining period pendants where safe and concealing modern wiring within existing routes. Choose historically appropriate switches, ironmongery, and colours that respect the house’s date and locality.
Clean tiles gently, replace only irreparable pieces, and avoid over-restoration. Let honest wear remain visible; it gives the hall its welcome and historical depth.
Preserve Living Room Features and Fireplaces
If your living room retains original fireplaces, shutters, cornices, panelled doors, or built-in cupboards, record and repair these features before altering the room’s layout or finishes. Photograph details, note surviving paint layers, and consult a conservation specialist before removing historic fabric.
Test fireplaces and flues professionally; don’t light an open fire until a sweep confirms that the chimney is safe and properly ventilated.
Repair cracked tiles, grates, and surrounds with compatible materials rather than replacing them with modern replicas. Clean fireplace mantels gently, preserving tool marks, patina, and period joinery.
Choose mantel décor sparingly: ceramics, framed prints, or a mirror should complement the room without obscuring architectural details.
Match new plaster, mouldings, and ironmongery to existing evidence, and retain unevenness that reflects the building’s age.
Insulate discreetly, but avoid sealing damp masonry.
Create a Practical Period-Style Kitchen
A period-style kitchen should serve modern routines without erasing the building’s history, so begin by identifying original features such as flagstone floors, ranges, dresser cupboards, beams, doors, and surviving tilework. Repair rather than replace wherever possible, and document alterations for future owners.
Plan efficient work zones discreetly, routing services through existing voids to limit damage. Choose Classic cabinetry with framed doors, painted timber, or locally appropriate joinery, avoiding glossy finishes and oversized modern units.
Vintage appliances can supply contemporary performance while echoing historical forms; conceal newer equipment behind sympathetic panels where practical. Use stone, timber, or handmade ceramic worktops in restrained colours, and match ironmongery to the house’s period.
Improve lighting with discreet fittings, then add ventilation without overwhelming original masonry or joinery. Ensure insulation and plumbing upgrades remain reversible and visually quiet.
Refresh Bedrooms With Authentic Details
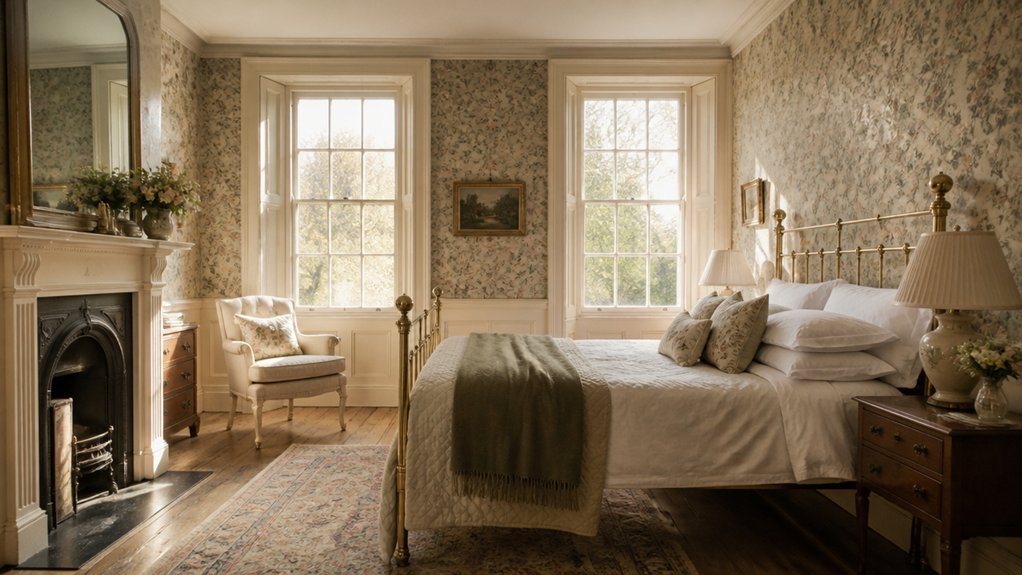
Restore original cornices, skirtings, shutters, and fireplaces where possible, repairing rather than replacing their period character.
Choose heritage colours that suit your home’s age, from muted Georgian tones to softer Victorian shades, and you’ll create a bedroom that feels both authentic and restful.
Restore Period Features
Period bedrooms come back to life when you preserve their original character rather than replacing it with generic finishes. Begin by inspecting skirtings, architraves, picture rails, cornices, and panelled doors. Repair cracks and loose joints with compatible materials, retaining shallow tool marks and gentle irregularities that record the room’s age.
If floorboards survive, lift and refit them carefully, replacing only irreparable sections with matching timber. Restore fireplaces where evidence remains, including cast-iron inserts, tiled cheeks, grates, and timber surrounds; never remove historic fabric simply to simplify decoration.
Check sash windows, shutters, and cupboard hardware, easing movement and repairing cords instead of installing visually discordant replacements. Choose period specific decor—such as a modest iron bed, turned legs, or a traditional washstand—to support, not imitate, historic architectural details.
Document every intervention, and consult a conservation specialist when alterations are uncertain.
Choose Heritage Colours
With the architectural details repaired, choose heritage colours that reinforce the bedroom’s age and proportions. Start by studying surviving paint beneath skirtings, inside cupboards, or behind radiators; these traces can reveal the room’s original scheme.
Heritage colour palettes often favour mineral reds, muted greens, smoky blues, ochres, and warm off-whites rather than stark modern shades. Match intensity to period: an understated Georgian room may suit chalky tones, while a Victorian bedroom can carry deeper, layered colour.
Consider using one hue across walls and woodwork for a quietly enveloping effect, or reserve a stronger shade for the dado or fireplace wall. Historical paint techniques, including distemper-like matt finishes and softly brushed edges, add convincing depth.
Test samples in changing daylight, and choose breathable, compatible coatings for old plaster and timber.
Update the Bathroom Without Losing Period Style
Updating a historic bathroom works best when you improve comfort and performance without erasing its character. Retain original features wherever possible, including encaustic floor tiles, glazed wall tiles, timber joinery, airing cupboards, and cast-iron baths.
Repair rather than replace, and record details before altering plumbing or fittings. Modern fixtures can sit comfortably beside period elements when you choose restrained forms: a high-level cistern, crosshead taps, or a basin with a ceramic pedestal often suits Victorian and Edwardian architecture better than anonymous contemporary units.
Conceal new pipework carefully, while ensuring future access for maintenance. Prioritise efficient ventilation, discreet underfloor heating, and water-saving mechanisms that won’t compromise historic fabric.
A sleek design needn’t look stark; use proportion, sympathetic materials, and traditional hardware to make the room feel authentically evolved.
Choose Authentic Paint Colours and Finishes
Choose paint colours that reflect your home’s age, architecture, and available light rather than relying on generic “heritage” palettes. Research local histories, surviving fragments, and period pattern books before choosing hues.
Georgian rooms often suit restrained mineral shades, while Victorian interiors can accommodate deeper greens, reds, and blues. Arts and Crafts houses benefit from earthy, nature-based tones.
Compare Vintage palettes beside your skirting, cornices, and joinery, since colours shift under daylight and electric lamps. Test large sample boards, allowing each shade to settle across morning, afternoon, and evening.
For Authentic finishes, choose breathable distemper on plaster where appropriate, traditional limewash in older masonry, and oil-based paints for timber only when evidence supports them. Don’t over-smooth historic surfaces; subtle brush marks and gentle variation can preserve their character.
Finish Each Room Without Losing Its History
Once the colours and finishes are right, complete the room with restraint, allowing its historic fabric to remain the focus. Choose furniture that respects the building’s proportions rather than mimicking a period interior.
Let original floorboards, plasterwork, cornices, doors, and fireplaces remain visible wherever possible, repairing them with compatible materials instead of replacing them unnecessarily.
For Historical preservation, retain evidence of age: gentle wear, tool marks, and slight irregularities can tell the house’s story.
Conceal modern wiring discreetly, and select lighting that suits the room’s scale without imitating history too literally.
Thoughtful Modern integration might include efficient radiators, discreet sockets, or a contemporary sofa, provided each addition sits comfortably beside older elements.
Use curtains, rugs, and artwork to add warmth, but avoid overcrowding.
Before making irreversible changes, photograph details and consult a conservation specialist when the fabric proves especially significant.
Conclusion
Restoring a British period home isn’t about freezing it in time; it’s about letting history live comfortably. As you repair rather than replace, remember that many Victorian houses contain more than a dozen layers of paint, each revealing changing tastes and generations of care. Preserve those clues where you can, conceal modern services thoughtfully, and choose materials that age gracefully. By respecting every cornice, hearth, floorboard, and doorway, you’ll create a home that feels authentic, useful, and distinctly yours.

