

You may not realise that rotten timber is often a symptom of concealed moisture, not the original cause of failure. Before you replace a joist in a heritage home, you need to trace damp, map the decay, and understand how the structure has moved over time. Careful shoring and discreet repairs can preserve more historic fabric than wholesale replacement—but the right intervention depends on what you uncover beneath the surface.
Key Takeaways
- Identify and correct moisture sources, drainage faults, leaks, and inadequate ventilation before repairing or replacing rotten timber.
- Assess joist condition, spans, bearings, connections, load paths, and remaining sound material through careful inspection and probing.
- Install documented, reversible temporary shoring on sound supports before removing timber or disturbing structural connections.
- Preserve original fabric wherever safe, using localized splices, scarf joints, or sistering instead of unnecessary wholesale replacement.
- Match replacement timber to the original species, grain, dimensions, moisture content, and working properties, then monitor the completed repair.
Find the Moisture and Map the Rot
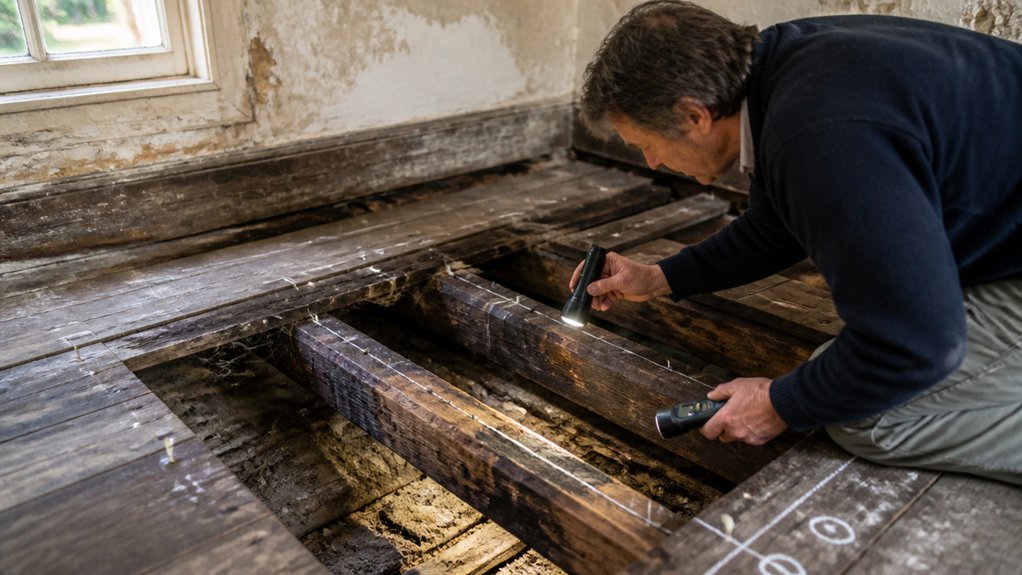
Before you replace a rotten joist, trace the moisture that caused the decay. Begin with careful Moisture detection: inspect gutters, downpipes, roof coverings, plumbing, ground levels, ventilation, and exterior joints.
Use a moisture meter as a guide, then confirm readings through visual inspection and seasonal observation. Don’t assume the dampest surface marks the original source; water can travel along masonry, boards, and grain lines before appearing below.
Record findings on a scaled sketch, noting staining, softness, fungal growth, insect openings, and areas that remain sound. This Rot mapping preserves evidence and shows how far decay has spread across the historic fabric.
Photograph each condition before cleaning or opening finishes. Where possible, correct the moisture pathway with compatible, minimally invasive repairs, respecting original materials and traditional construction.
Assess Rotten Joists for Structural Risk
Once you’ve mapped the decay, assess what the joist still does structurally rather than judging it by appearance alone. Trace its span, bearing points, grain direction, and connections, then look for sagging, twisting, crushing, splitting, or excessive spring under normal loads.
Probe suspect areas carefully, but don’t mistake softened surface fibres for complete failure; decay often follows predictable moisture paths. Compare sound sections with damaged ones and record dimensions before removing any fabric.
Consider how loads travel through adjoining joists, walls, beams, and partitions, while respecting alterations made over time. Historic techniques, such as reading tool marks and traditional jointing, can reveal original intent and help distinguish later damage.
Apply preservation ethics: retain sound, repairable timber wherever safety permits, and seek a conservation-minded structural assessment when capacity remains uncertain.
Shore Up the Home Before Repairs
If a rotten joist carries a floor, partition, or ceiling, shore the affected area before disturbing its connections or removing any timber. Have a qualified professional assess the load path, then install adjustable shores, needles, or a temporary frame on sound bearing points.
Protect plaster, lath, flooring, and finishes with spreader plates and padded contact surfaces; don’t transfer loads onto fragile historic fabric. Check for movement as you tighten supports, and monitor cracks, deflection, and unusual sounds throughout the work.
Your preparation should follow foundation analysis, because settlement or shifting masonry may make temporary support unstable. Keep the shoring reversible and clearly documented, preserving historical accuracy while maintaining safe access.
If weather, vibration, or hidden decay complicates the work, stop and obtain engineering advice before proceeding with any intervention.
Compare Splicing, Sistering, and Replacement
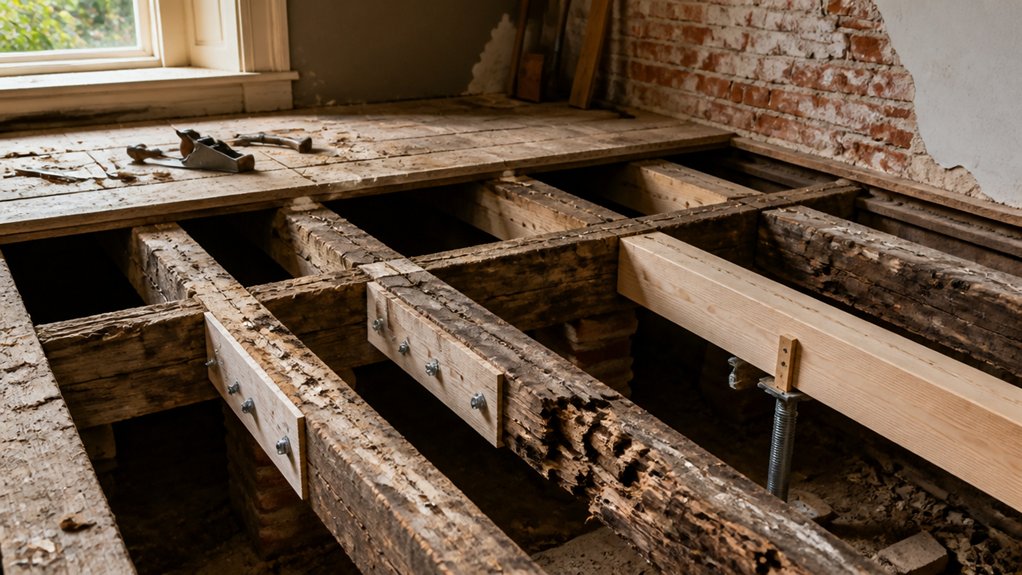
You’ll weigh splicing against sistering by considering the joist’s remaining strength, access, and historic fabric.
Splicing retains more original timber, while sistering adds a parallel structural member with less disturbance.
When decay is extensive, you may need full timber replacement, carefully matching the original species, dimensions, and workmanship.
Splicing Versus Sistering
When a heritage joist has localized decay, splicing often preserves more original fabric than full replacement, while sistering can reinforce sound timber with less cutting and disruption.
You’ll use a splice when decay ends cleanly and the remaining joist can receive a properly sized, well-supported timber section. Carefully matched grain, compatible wood expansion, and traditional joinery techniques help the repair move naturally and remain visually respectful.
Sistering suits joists with broader weakness but adequate bearing and access. You’ll install a new member alongside the existing one, fastening it to share loads without unnecessarily removing historic material.
Before choosing, you should trace moisture sources, verify bearing conditions, and obtain an engineer’s assessment where loads or connections are uncertain.
Neither method should conceal active decay; repair only after you’ve corrected drainage, ventilation, and leaks.
Full Timber Replacement
Full timber replacement becomes appropriate when decay, insect damage, or structural alteration has compromised too much of the original joist for a reliable splice or sister.
Before removing it, you should document its dimensions, species, tool marks, joints, and bearing points. Retain sound fragments where possible, both for Historic authenticity and as evidence for accurate reconstruction.
Select replacement timber with careful attention to Material compatibility, moisture content, grain orientation, and load capacity; a visually similar species isn’t automatically structurally suitable.
Your carpenter should reproduce traditional dimensions and connections rather than impose unnecessary modern details.
Support the surrounding structure before cutting out the joist, then reinstate bearings and fire separation correctly.
Keep removed fabric, labels, and photographs in the project record.
Building-control approval, an engineer’s review, and discreet intervention will protect both safety and heritage value.
Repair Rotten Joists Without Losing Historic Fabric
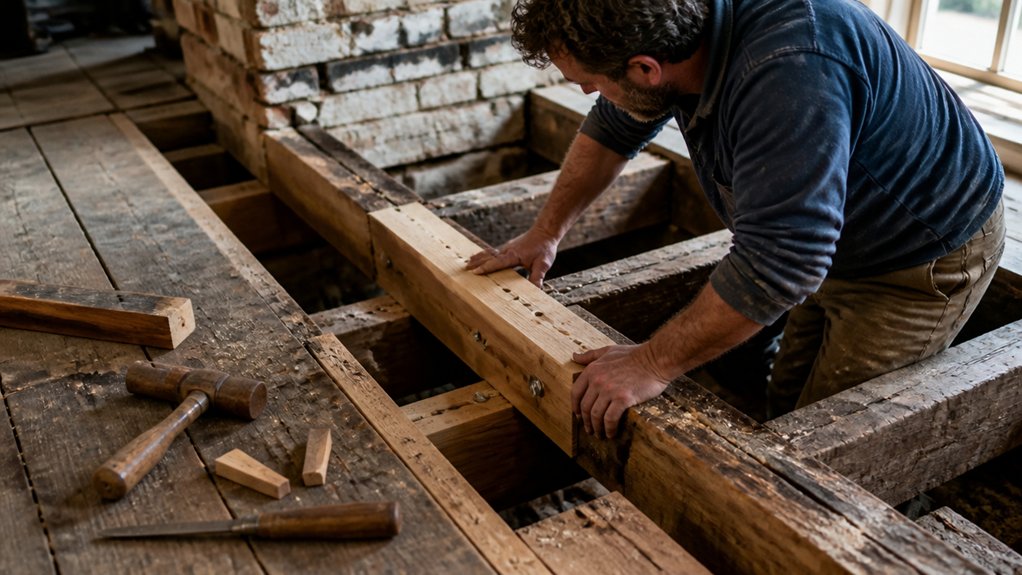
Before repairing a rotten joist, you’ll assess its remaining sound timber, moisture sources, and structural capacity.
Choose reversible interventions where possible, such as discreet sistering or carefully detailed splices, so future repairs won’t damage historic fabric.
You’ll preserve as much original material as safety permits while documenting every intervention.
Assess Timber Condition
To assess a rotten joist without sacrificing historic fabric, trace the decay to its source and examine the timber in place before removing anything. Look for fungal decay, insect galleries, persistent damp, crushed fibres, and deflection, then map each finding with photographs and measurements.
Test questionable areas carefully with a probing tool, resisting the temptation to cut into sound-looking surfaces. Check bearing ends, joints, concealed pockets, and nearby masonry, because trapped moisture often drives deterioration.
Compare affected timber with adjacent members to distinguish historic tool marks from recent damage. Record species, grain, dimensions, and any previous alterations; this evidence supports historical accuracy and guides proportionate decisions.
Identify the moisture pathway before considering timber treatments, and consult a conservation professional when structural capacity remains uncertain. Keep every assessment record with the project file.
Use Reversible Repairs
With the decay source and remaining sound timber documented, choose the least intrusive repair that restores capacity while preserving original material.
Design a reversible intervention, such as a bolted side splice or carefully detailed steel support, so future conservators can remove it without unnecessary cutting or demolition.
Size connections for verified loads, provide adequate bearing, and isolate dissimilar metals from damp timber to prevent further corrosion and staining.
Don’t conceal fixings until an engineer and conservation specialist have reviewed access, moisture control, and movement.
Match the repair’s geometry and finish to the existing structure without creating a false historical feature.
Record every component, connection, and treatment for future maintenance.
Coordinate surrounding paint preservation with the repair sequence, and retain clear evidence of the intervention to support historical accuracy and informed stewardship.
Preserve Original Materials
Preserve every sound, original joist component you can, because historic timber carries evidence of the building’s construction, alterations, and craftsmanship. Before cutting, map decay with probes, moisture readings, and careful inspection, then mark the minimum area requiring intervention.
Retain intact ends, tool marks, fastener holes, and adjoining boards wherever they remain structurally reliable. When deterioration threatens capacity, use a discreet splice, scarf, or sistered section rather than wholesale replacement.
Match the species, grain direction, density, moisture content, and working properties of replacement timber to the existing joist. This material compatibility supports sound load transfer and limits differential movement.
Record each decision and distinguish new work subtly, supporting historical accuracy without creating visual distraction. Don’t remove historic fabric merely for neatness; stabilise it, protect it from moisture, and monitor its performance.
Fix Damp, Drainage, and Ventilation Problems
Before repairing a rotten joist, find and correct the source of moisture that caused the decay. Inspect gutters, downpipes, flashings, roof coverings, plumbing, and ground levels around the foundation.
Clear blocked drainage, extend outlets away from walls, and repair leaks with methods compatible with the building’s age. Don’t seal damp masonry with impermeable coatings; allow historic materials to dry naturally.
Check suspended floors for blocked airbricks, overgrown vegetation, and altered ground conditions. Restore airflow beneath the floor by opening or carefully upgrading existing vents, while preventing rodents from entering.
This ventilation improvement reduces condensation and protects remaining timber.
For lasting damp prevention, maintain gutters seasonally, monitor humidity, and keep soil below damp-proof courses where present. Before replacing timber, confirm the structure has dried and address any continuing water movement.
Conclusion
Repairing rotten joists isn’t simply a matter of replacing timber—it’s a careful balance between safety and stewardship. By tracing moisture, documenting original work, shoring responsibly, and choosing discreet repairs, you’ll protect both the structure and its heritage character. Remember, untreated damp can raise timber moisture above the roughly 20% threshold where fungal decay becomes active. Address the water first, and your conservation-minded repair can remain sound, reversible, and respectful for generations to come.

