

A Georgian townhouse is a layered record of craftsmanship, and your renovation should treat each floor as a page in its history. Begin by documenting the building, checking listing and planning rules, and evaluating the roof, walls, and structure before changing anything. Then protect original features, upgrade services discreetly, and improve comfort without erasing character. The right sequence matters, because one overlooked defect above may shape every decision below.
Key Takeaways
- Survey and document the townhouse’s structure, original features, room layout, defects, and service routes before planning any work.
- Confirm heritage status, obtain required planning, listed-building, and building-regulations approvals, then establish priorities, budgets, contingencies, and project phases.
- Repair the roof, chimneys, masonry, drainage, windows, floors, and stairs using compatible traditional materials and skilled conservation craftsmen.
- Preserve Georgian proportions, room hierarchy, fireplaces, mouldings, and circulation, concentrating functional changes in secondary spaces and ensuring interventions remain reversible.
- Upgrade electrical, plumbing, heating, insulation, lighting, paint, and hardware discreetly while maintaining breathability, ventilation, period character, and complete project documentation.
Plan Your Georgian Townhouse Renovation
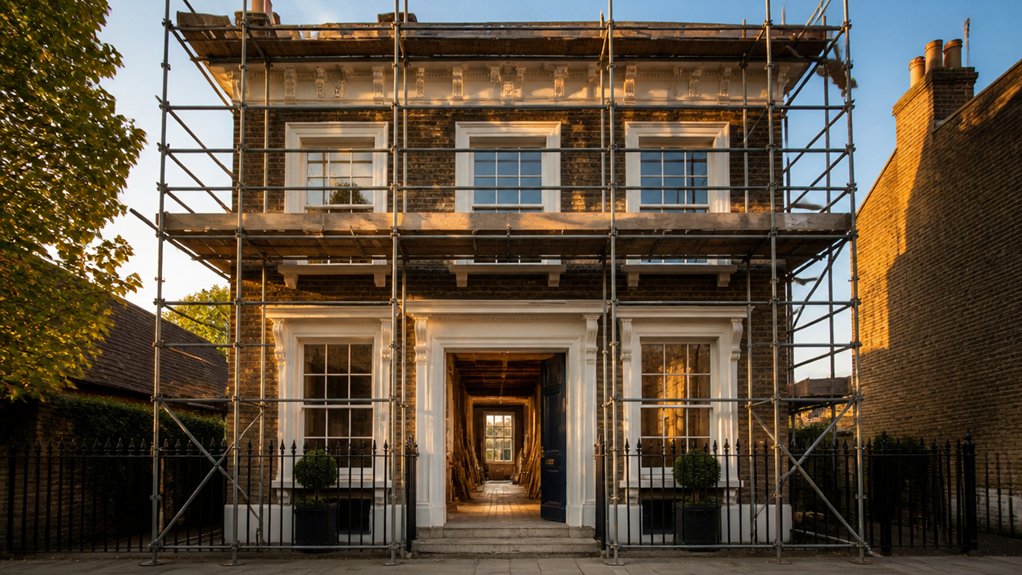
Before work begins, establish a clear renovation plan that respects your Georgian townhouse’s original character while meeting modern needs. Survey each room, recording cornices, ceiling roses, sash windows, shutters, fireplaces, floorboards, stair details, and surviving finishes. Photograph defects and create measured drawings before removing anything.
Define priorities: address structural problems, improve services discreetly, and phase cosmetic work around essential repairs. Set a realistic budget, including professional fees, contingencies, specialist craftsmanship, and temporary accommodation if required.
Use historical accuracy to guide decisions, matching proportions, profiles, colours, and construction methods rather than imposing fashionable substitutes. Research material sourcing early, favouring reclaimed or traditionally manufactured brick, timber, stone, lime plaster, and paint.
Keep a written schedule of decisions, samples, costs, and responsibilities. That discipline helps you protect character while delivering comfortable, durable rooms.
Check Planning and Listing Rules
Check the property’s legal status before finalising designs or appointing contractors. Confirm whether your Georgian townhouse is listed, lies within a conservation area, or has other local heritage protections. These designations can control changes to windows, doors, interiors, paint colours, railings, and original layouts.
Contact your local planning authority and conservation officer early. Ask which heritage regulations apply, what evidence they’ll require, and whether you need listed-building consent, planning permission, building-regulations approval, or all three.
Don’t assume ordinary permitted alterations remain acceptable to a listed property; unauthorised work can lead to enforcement, costly reversal, or prosecution.
Study the listing description and retain drawings, photographs, and specifications for your records. Appoint an architect or surveyor experienced with historic townhouses, and secure written approvals before work starts.
Build decision times into your programme and budget.
Repair the Roof, Chimneys, and Walls
Start by evaluating roof damage, including slipped slates, failing leadwork, and signs of water ingress.
Restore chimney brickwork with compatible materials, then repair exterior walls using appropriate lime mortar and traditional techniques.
You’ll protect the townhouse’s structure and preserve its Georgian character by addressing these defects carefully.
Assess Roof Damage
How sound is your Georgian townhouse’s roof? Begin with a professional roof inspection before planning any repairs. From ground level, look for slipped slates, sagging lines, damaged leadwork, blocked valleys, and overflowing gutters.
Then access the roof safely, using suitable protection, to check underlay, rafters, timbers, and signs of daylight or damp. Record every defect with photographs and measurements, noting whether damage appears historic or active.
Arrange a chimney assessment separately, checking pots, flashings, mortar joints, flaunching, and movement from inside the loft as well as outdoors. Don’t disturb fragile historic fabric until a conservation-minded contractor has identified the cause.
Ask your surveyor to assess ventilation, insulation, and drainage together, since poorly considered upgrades can trap moisture. Prioritise urgent leaks and instability, obtain like-for-like repair advice, and confirm listed-building requirements before commissioning work.
Restore Chimney Brickwork
Before repointing a Georgian townhouse chimney, establish whether the brickwork is suffering from open joints, frost damage, spalling, or structural movement. Arrange a survey with a conservation-minded mason, particularly if stacks lean, crack, or show loose bricks.
Your repairs should preserve original proportions, handmade bricks, and historic tooling rather than impose a uniform modern finish. Remove failed joints carefully by hand, avoiding damage to soft Georgian brick faces.
For chimney brickwork, specify a breathable lime mortar; hard cement can trap moisture and accelerate decay. Prioritise mortar matching by analysing the existing joint’s colour, aggregate, texture, and strength, then test sample panels before full repointing.
Replace only irreparably damaged bricks, using compatible reclaimed or traditionally made units. Cap open flaunching, renew defective pots, and check flashings without altering the stack’s character.
Guarantee every repair remains weatherproof yet vapor-permeable.
Repair Exterior Walls
Exterior walls need a careful assessment before any repair begins: look for open joints, bulging masonry, stepped cracks, damp patches, peeling coatings, and frost-damaged bricks.
Have a conservation professional investigate movement and trace moisture to its source before you repoint or replace materials.
Match existing brick, stone, mortar colour, texture, and strength; avoid hard cement mortar, which can trap water and damage Georgian masonry.
Rake out failed joints carefully, then repoint with compatible lime mortar, protecting fresh work from frost and rapid drying.
For stucco repair, remove only loose areas and renew them with breathable, historically appropriate coats rather than impermeable render.
Stone wall restoration requires gentle cleaning, discreet indents, and carefully matched replacement stone.
Repair gutters, downpipes, flashings, and ground drainage too, then redecorate with mineral or limewash finishes.
Protect Original Georgian Features

Protecting original Georgian features should guide every renovation decision, from the cornice and sash windows to the staircase, panelled doors, fireplaces, and timber flooring.
Begin by recording each element with photographs, measurements, and notes on materials and damage. Don’t remove historic fabric simply because it looks worn; consult a conservation specialist before repairing or replacing anything.
Use gentle cleaning methods, traditional materials, and skilled craftspeople who understand Georgian construction.
Retain irregularities that reflect the building’s age, while making discreet repairs that preserve structural integrity.
Match missing mouldings, ironmongery, and paint colours through careful research rather than guesswork.
Respect the home’s proportions and architectural detailing, and check every alteration against historical accuracy.
Keep original components in place whenever possible, documenting any unavoidable intervention for future owners.
Upgrade Services and Insulation
Upgrade electrical, plumbing, heating, and insulation systems with minimal disruption to historic fabric. Begin with a condition survey, then map existing routes before lifting floors, chasing walls, or opening ceilings. You’ll protect cornices, panelling, staircases, and original plaster by reusing service voids and planning access points carefully.
Have a qualified electrician assess capacity, earthing, fire protection, and discreet cable routes. Replace obsolete plumbing and heating components while retaining sound pipework where practical. Consider zoned controls, efficient boilers, or a heat pump only after checking the building’s fabric and ventilation requirements.
Plan insulation upgrades with breathable materials suited to solid masonry. Avoid impermeable membranes that trap moisture and cause decay. Insulate roofs and floors sensitively, improve draught control, and balance energy efficiency with adequate ventilation.
Obtain conservation approval before altering significant features.
Improve the Layout Without Losing Character
When reworking the layout, preserve the townhouse’s original hierarchy of rooms, proportions, and circulation wherever possible. Start by mapping existing walls, ceiling heights, fireplaces, and service routes before proposing changes.
For effective Historic preservation, keep principal rooms legible and concentrate alterations in secondary spaces, such as rear additions, closets, or later subdivisions. You can improve daily function by opening carefully selected connections, adding discreet storage, or relocating utilities without erasing the sequence from entrance hall to reception rooms.
Use reversible interventions where feasible, allowing future owners to understand and adapt the building. Interior modernization should support, not overpower, the architecture: choose understated partitions, consistent sightlines, and materials that respect the period.
Consult a conservation professional before removing walls, and verify approvals for protected features or listed buildings.
Restore Windows, Doors, Floors, and Stairs

Restore original windows wherever possible, repairing timber, glazing, and ironmongery before considering replacement.
You’ll preserve the townhouse’s character by repairing worn floors and stairs, retaining historic boards, treads, and mouldings wherever they remain sound.
Use compatible materials and skilled craftsmanship so every intervention respects the building’s age and improves its daily performance.
Restore Original Windows
Original timber windows are among a Georgian townhouse’s defining features, so repair them before considering replacement. Begin with a condition survey by a joiner experienced in historic buildings. Check frames, glazing bars, pulleys, cords, weights, and sills for rot, distortion, draughts, and failed joints.
Carefully remove modern paint layers, then use traditional linseed-oil putty and breathable finishes where appropriate. Preserve Vintage glass whenever it remains sound; its subtle irregularities contribute to the façade’s character.
Effective sash restoration may include splicing damaged timber, replacing cords, servicing weights, and easing sticking sashes without altering their proportions. Add discreet brush seals or secondary glazing to improve comfort while retaining the original window boxes and sightlines.
Obtain listed-building consent before changing glazing, colours, or external details, and document every repair for future maintenance.
Repair Floors And Stairs
Once the windows are secure, turn your attention to the floors and stairs, which often reveal how a Georgian townhouse has changed over time. Lift carpets carefully, recording board positions before removing them. Replace damaged boards with matching, reclaimed timber rather than modern softwood, and investigate damp or beetle activity before repairs begin.
Floor sanding can revive sound boards, but use a light touch: aggressive machinery may erase patina, tool marks, and historic stains. Secure loose boards with discreet fixings, correct unevenness only where necessary, and retain evidence of earlier alterations.
For stair refurbishment, repair treads, risers, strings, and balustrades in situ whenever possible. Match existing timber and profiles, strengthen hidden joints, and avoid replacing a worn handrail simply for uniformity.
Finish floors with breathable oil or wax, not impermeable coatings.
Fit Modern Kitchens and Bathrooms Respectfully
Modern kitchens and bathrooms should meet contemporary needs without erasing the townhouse’s historic character. Plan services carefully, routing plumbing and ventilation through existing voids where possible rather than cutting into original joinery, plaster, or masonry. Keep new work reversible, and document every alteration before construction begins.
In the kitchen, position contemporary appliances discreetly, maintaining clearances and efficient circulation without overwhelming the room’s proportions. Use durable, moisture-resistant materials, but let the building’s scale guide cabinet heights and layouts.
In bathrooms, modern fixtures can provide comfort while fitting compact, historically sensitive spaces. Strengthen floors before installing heavy sanitaryware, and confirm that drainage can handle increased demand.
Improve insulation and extraction to control condensation, especially around external walls. Always obtain consent for listed alterations, and ask a conservation professional to resolve conflicts between accessibility, performance, and fabric protection.
Choose Period-Appropriate Paint, Lighting, and Hardware
Choose finishes that respect the townhouse’s period without turning every room into a pastiche. Begin with period-appropriate colors: soft stone, chalk, muted greens, smoky blues, and warm whites generally suit Georgian proportions better than stark modern shades. Test samples against changing daylight, and use different strengths to clarify cornices, shutters, and paneling without creating excessive contrast.
Select lighting that supports the architecture. Wall lights, discreet picture lights, and simple central pendants can provide layered illumination. Position fittings carefully so wiring doesn’t damage original plasterwork. Where possible, use traditional forms with modern, efficient bulbs.
Finish rooms with authentic hardware. Choose brass, bronze, or painted iron knobs, latches, hinges, and switch plates that match the house’s scale and existing details. Retain sound originals, repair them where practical, and avoid unnecessarily replacing character-defining fittings during renovation.
Conclusion
Renovating your Georgian townhouse isn’t simply an upgrade—it’s a responsibility. Remember that many Georgian buildings have stood for more than 250 years, surviving changing families, fashions, and technologies. Your careful decisions can help yours endure for centuries more. By planning thoroughly, securing approvals, repairing before replacing, and choosing discreet modern improvements, you’ll protect its character while making it comfortable today. Preserve what’s irreplaceable, record every intervention, and leave the next generation a stronger, living piece of history.

