
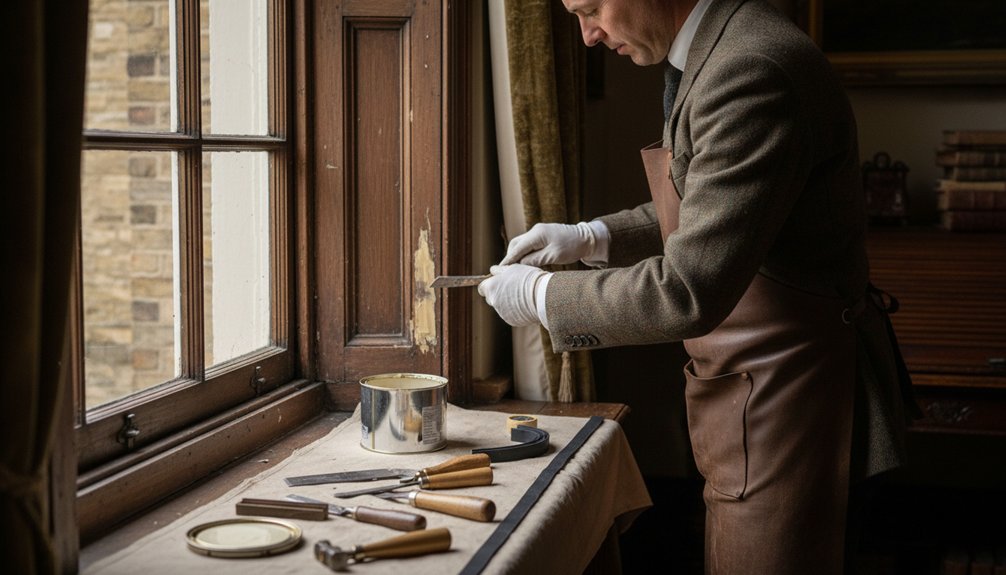
Like a well-kept Georgian façade, your historic sash windows can preserve both character and comfort when you repair them with care. Start by inspecting the timber, joints, cords, glazing, and paint before forcing anything open or replacing original material. You can handle minor adjustments, but rot, movement, and listed-building concerns may require a specialist. With the right sequence, you’ll improve draught control discreetly—while avoiding one common mistake that can damage the window’s history.
Key Takeaways
- Inspect timber, glazing, joints, cords, pulleys, beads, putty, and surrounding masonry before planning repairs.
- Handle minor draughts and putty failures yourself, but hire specialists for structural rot, unstable frames, or historic glass.
- Remove only rotten timber, repair joints with compatible materials, and splice matching timber into severely weakened sections.
- Replace broken sash cords carefully, free painted-shut sashes gently, and verify smooth movement before finishing.
- Install reversible sash seals or secondary glazing, then apply breathable paint without obstructing movement or drainage.
Inspect Historic Sash Windows for Damage

Before you repair or draught-proof a historic sash window, inspect it carefully to understand its condition and construction. Note the frame’s timber species, glazing pattern, mouldings, fasteners, and any surviving labels, since these details reveal its Historical significance.
Examine meeting rails, staff beads, parting beads, pulleys, cords, and weights for distortion, loosened joints, corrosion, or missing components.
Look closely for open seams, rot, insect damage, cracked glass, failed putty, and previous patches that may conceal problems.
Test each sash gently for movement, recording stiffness, rattling, and uneven gaps without forcing it.
Photograph every elevation and mark defects on a simple sketch.
Check surrounding plaster and masonry for moisture sources.
Your careful record will guide compatible preservation techniques while protecting original fabric and retaining evidence of the window’s craftsmanship.
Decide Which Repairs Are Safe to DIY
Assess whether the damage is limited to light draughts, loose putty, or minor timber repairs you can address without disturbing historic fabric.
You shouldn’t attempt work involving rotten frames, failing cords, structural movement, or specialist glass.
When the sash’s stability or heritage details are at risk, hire a professional experienced in historic windows.
Assess Damage Severity
When inspecting a historic sash window, distinguish reversible wear from damage that threatens the frame, glass, or surrounding masonry. Look for loose putty, peeling paint, worn staff beads, minor draughts, and stiff cords; these usually indicate manageable maintenance.
Probe suspect timber gently with an awl. Sound wood resists pressure, while soft, crumbly, or deeply split areas signal decay. Check joints, pulley stiles, meeting rails, and sill ends especially carefully.
Note cracked panes, missing glazing compound, water staining, and gaps where the frame meets the wall. Photograph each defect and map its location before removing anything.
For historical preservation, retain original glass, mouldings, and tool marks whenever possible. Choose repairs based on material compatibility: use breathable coatings, matching timber, and compatible putty rather than hard modern fillers that trap moisture.
Tackle small, stable defects first.
Know When To Hire Professionals
Handle routine tasks yourself if the timber remains sound and the work involves cleaning, renewing putty, easing paint-bound sashes, replacing cords, or fitting draught seals without altering historic fabric. Take safety precautions: wear eye protection, control dust, secure ladders, and never force swollen or painted joints.
Choose professional consultation when you find rot in pulley stiles, rails, or meeting rails; cracked glass; distorted frames; failed sash boxes; or extensive decay requiring splicing. A specialist can match timber species, replicate mouldings, retain original glass, and use reversible repairs that respect the window’s character.
Hire a qualified contractor for scaffold work, hazardous coatings, or windows in listed buildings where consent may apply. Don’t remove sound historic fabric merely to simplify repairs.
Photograph each stage, record materials, and ask a conservation professional before altering sections you can’t reinstate accurately.
Repair Rotted Wood and Loose Joints
Start by evaluating the rot’s depth, location, and effect on the sash’s strength. You’ll need to remove only unsound timber while preserving original wood wherever possible.
Then strengthen loose joints with careful cleaning, suitable adhesive, and discreet mechanical support where necessary.
Assess Rot Damage
Before you repair a historic sash window, inspect every component for soft, darkened, or crumbling timber, particularly at the sill, lower sash joints, glazing bars, and meeting rails where moisture lingers.
Press suspect areas gently with an awl; sound wood resists, while a sinking tip indicates decay. Probe end grain, joints, and paint blisters, then check for staining, fungal growth, and damp-trapping debris.
Don’t confuse surface softness with deep failure: scrape loose paint carefully and test the timber beneath.
Map each affected area, photograph details, and record dimensions before removing anything.
Trace moisture back to failed putty, open seams, blocked drainage, or leaking coverings. This evidence supports sound Wood preservation and Historical accuracy.
Mark isolated decay for careful removal, but retain stable original timber wherever possible.
Strengthen Loose Joints
Once you’ve mapped the damage, stabilise loose sash joints before removing sound original timber. Protect surviving fabric, then gently clean each joint with a narrow chisel and brush, removing failed putty, paint, and friable fibres without enlarging the housing. Test the joint dry and mark its original alignment.
For minor movement, inject reversible animal-glue adhesive or a compatible conservation resin, then clamp the meeting rails square with padded cramps. Wipe away squeeze-out immediately.
Where a peg has failed, drill through the existing hole and insert a matching hardwood dowel with adhesive; don’t introduce oversized screws that can split slender rails.
Severely weakened corners may need discreet timber joint reinforcement: splice in seasoned, matching-grain wood, shaped to retain the historic profile. These joint stabilization techniques preserve authenticity while restoring strength.
Let repairs cure fully before repainting, glazing, and refitting.
Unstick Sash Windows Without Damage
When a historic sash window sticks, don’t force the meeting rails or pry against the glass; instead, inspect the frame for swollen paint, loose putty, or debris in the staff beads and parting beads.
Score paint lines carefully with a sharp knife, then ease the sashes using a thin tapping block and a light mallet. Work gradually along each edge, protecting timber and glazing.
Brush out dust, and remove only loose, non-historic paint; retain sound original finishes for historical accuracy.
Apply minimal sash window lubrication, such as beeswax or a conservation-approved dry lubricant, to sliding surfaces—not oily products that attract grit.
Check that fasteners and beads sit correctly, but don’t alter sound fabric unnecessarily.
If movement remains restricted, pause and consult a joiner experienced in traditional sash windows before causing hidden damage.
Replace Broken Sash Cords
If a sash still won’t stay open after careful freeing, a broken sash cord may be the cause. Protect the glass, then remove the staff bead and ease the sash from its box.
Open the pocket cover, retrieve the fallen weight, and measure the old cord before replacing it with appropriately sized sash cord.
Tie a secure knot through the sash’s routed hole, thread the cord over its pulley, and attach the weight so the sash balances smoothly.
Check that pulleys turn freely, cleaning and lubricating them only where appropriate.
Understanding Sash cord history helps you match traditional materials and methods rather than introducing unsuitable modern fittings.
During Vintage hardware restoration, retain sound pulleys, nails, and fasteners; replace only damaged components.
Refit the sash and beads carefully, confirming movement before final securing.
Draught-Proof Sash Windows Without Changing Their Look

Draught-proofing can make historic sash windows warmer and quieter without erasing their original character. For Historical preservation, choose discreet seals designed for sliding sashes rather than bulky modern replacements.
A specialist can fit brush strips or flexible compression seals into the meeting rails, parting beads, staff beads, and pulley-stile junctions, keeping them largely out of sight. These seals reduce rattling and unwanted air movement while allowing each sash to open, close, and be removed for future maintenance.
Don’t seal over drainage paths or force tight joints; trapped moisture can damage timber. Consider a secondary glazing panel on the room side when you need extra comfort. It adds Modern insulation without altering the exterior sightlines, glass, or historic hardware.
Test operation after fitting, and retain reversible details wherever possible, so future conservation work remains straightforward.
Restore Glass, Putty, Paint, and Timber
Once the sashes operate smoothly and the draught seals are in place, restore the visible fabric with equal care. Remove loose paint, but don’t erase tool marks or sound historic layers unnecessarily.
Consolidate flaking timber with a compatible repair system, then splice in matching-grain wood where decay has weakened rails, stiles, or glazing bars.
Retain Decorative glass whenever possible; label each pane before removal, and bed it carefully to prevent stress.
Cut out failed compound, but preserve sound historic putty and replicate its slender, slightly bevelled profile.
Prime exposed timber, including end grain, before applying breathable, traditional paint in historically appropriate colours.
Allow each coat to dry fully, and keep paint off pulley stiles, staff beads, and meeting rails.
Finally, check that glazing and finishes don’t restrict movement or compromise drainage.
Conclusion
Historic sash windows reward careful, reversible work. Inspect each component, tackle only repairs you can complete safely, and call a specialist when rot, movement, or listed-building requirements demand expertise. Replace cords, ease sticking sashes, and add discreet seals without sacrificing original fabric. Restore putty, glass, paint, and timber with compatible materials, then maintain them regularly. Treat the window as a living record: with patience, you’ll preserve its character while closing the draughts that have long been its unwelcome companions.

