

You’ll assess the building, protect its character, and plan each intervention before work begins. Start with a measured survey, condition report, and permissions check, then set a realistic programme and appoint specialists familiar with historic fabric. Next, sequence structural repairs, weatherproofing, services, and period finishes, allowing time for careful testing and documentation. The final stages bring inspections, snagging, and handover—but one early decision can shape the entire restoration.
Key Takeaways
- Research the property’s history, commission a comprehensive survey, and identify structural, moisture, decay, and historic-fabric issues.
- Confirm listing status, planning permissions, building regulations, party-wall requirements, and environmental constraints before starting work.
- Create a realistic programme that prioritizes stabilization, watertightness, structural repairs, services, conservation, finishes, and drying time.
- Appoint suitably experienced conservation specialists, agree responsibilities, source compatible materials, and review progress at scheduled milestones.
- Complete systematic snagging, test all services, document repairs and concealed installations, and archive warranties, certificates, photographs, and as-built records.
Plan Your Period Property Restoration

Begin by establishing the property’s history, original features, and current condition before any work starts. Gather deeds, photographs, historic maps, and previous repair records to understand how the building evolved.
Next, define your restoration aims: decide which rooms, elevations, and details require immediate attention, and distinguish essential repairs from later enhancements.
Set a realistic sequence, beginning with urgent protection against water, movement, or decay, then progressing toward structural repairs, fabric conservation, and finishes.
Build Historical accuracy into every decision by preserving surviving evidence rather than imposing a preferred period style.
Plan Material sourcing early, identifying compatible brick, stone, timber, glass, lime, and fittings that match existing work.
Finally, create a written schedule, cost allowance, and contingency so you can coordinate trades and protect original fabric throughout the project.
Survey the Building and Check Permissions
With your restoration priorities and sequence set, commission a thorough survey before specifying repairs or appointing trades. Ask your surveyor to record the building’s age, alterations, construction methods, defects, and surviving historic features.
Trace movement, damp, timber decay, roof failures, and previous repairs, distinguishing urgent risks from work that can wait. Photograph and map details, including mouldings, finishes, windows, and masonry, so you can protect evidence and maintain historical accuracy.
Next, check your local authority’s records and confirm whether the property is listed, lies in a conservation area, or has planning conditions. Seek consent before altering protected fabric, removing features, or changing the exterior.
Review building regulations, party-wall obligations, and environmental constraints too. Use the survey to guide material sourcing, matching historic fabric without concealing significant evidence or making premature repairs.
Set the Programme and Hire Specialists
Once the survey and permissions are clear, set a realistic programme that follows the building’s needs: stabilise urgent defects first, then address the envelope, services, and interior finishes in a logical sequence. Allow time for drying, inspections, approvals, and discoveries hidden within later alterations. Record each stage against the property’s historical significance, so your decisions protect original fabric rather than impose a modern schedule.
Next, appoint specialists with proven experience in comparable period buildings. You may need a conservation architect, historic-building surveyor, stonemason, joiner, plasterer, and services engineers who understand conservation guidelines. Check references, insurance, availability, and familiarity with listed-building controls before agreeing scopes and contracts.
Ask every specialist to explain methods, materials, lead times, and dependencies. Hold a pre-start meeting, confirm responsibilities, and keep a dated programme that you’ll review after each milestone.
Repair the Structure and Make It Watertight
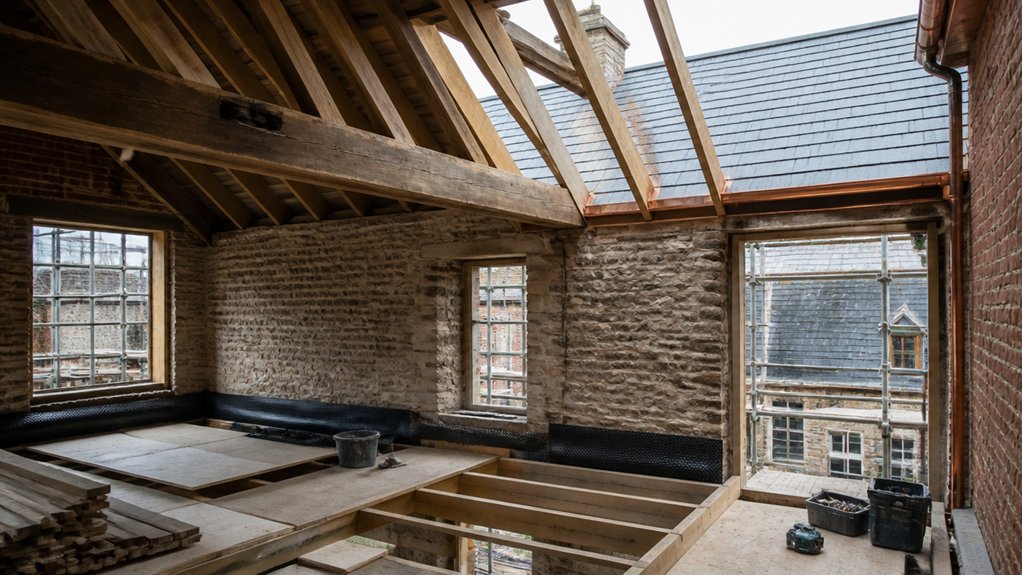
Next, you’ll assess the building’s structural damage, recording movement, decay, and weakened fabric before repairs begin.
Then, you’ll restore the roof and gutters, retaining historic materials where sound and replacing failed sections with compatible details.
This work will stabilise the structure and keep the building watertight for later restoration stages.
Assess Structural Damage
Before cosmetic restoration begins, determine how the building’s structure has weathered time and water. Start with a measured survey, recording movement, cracks, distortions, settlement, and damp at walls, floors, openings, and foundations.
Compare findings with historic drawings, photographs, and alterations, then ask a conservation professional to identify urgent risks without stripping significant fabric.
Next, inspect masonry joints, timber ends, beams, joists, and partitions for decay, insect attack, inappropriate repairs, or overloaded areas. Use gentle, reversible investigations wherever possible, and photograph every condition before intervention.
Establish priorities: stabilise unsafe elements, trace moisture sources, and protect vulnerable interiors. Keep Historical accuracy central when judging later additions or replacement work.
Finally, prepare a phased repair schedule and budget, confirming Material sourcing for compatible brick, lime mortar, timber, and stone.
Restore Roof and Gutters
How can you protect historic fabric while making the building watertight? Begin after evaluating structural damage, recording every defect and photographing original details. Prop the roof safely, then remove only failed coverings, retaining sound slates, tiles, rafters, and battens for reuse. Protect exposed interiors with temporary sheeting, but allow ventilation to prevent trapped moisture.
Next, repair the structure: splice decayed timber with matching seasoned wood, replace unsafe members, and preserve historic joints wherever possible. Maintain the roof’s original pitch and profile to support historical accuracy.
Your material sourcing should prioritize reclaimed or locally produced slates, handmade tiles, and compatible lime-based materials; avoid impermeable cement repairs that trap water.
Finally, relay coverings using traditional fixing patterns, renew leadwork carefully, and install gutters with appropriate falls. Test downpipes, confirm discharge routes, and monitor the roof through heavy rain before removing temporary protection.
Upgrade Services Without Losing Character

Modernize essential services while preserving the building’s historic character. Begin by commissioning surveys of the electrical, plumbing, heating, and ventilation systems before opening walls or floors. Record existing routes, materials, and defects, then agree priorities with your conservation officer and qualified specialists.
Next, design discreet upgrades that meet current safety standards without erasing original fabric. You might run cables through existing voids, reuse service chases, or position outlets where later alterations already exist. Choose reversible methods wherever possible, and protect beams, plaster, joinery, and masonry during installation.
Before work starts, confirm permissions, specifications, and inspection requirements. Photograph concealed services as they’re installed, label circuits and pipes, and retain serviceable historic components when safe.
Careful sequencing gives you dependable performance while maintaining period authenticity and historical accuracy. Finally, test every system, collect certificates, and update your maintenance records.
Fit Kitchens, Bathrooms, and Period Finishes
Once the structure and services are secure, fit kitchens and bathrooms around the building’s historic fabric rather than forcing original features to accommodate modern layouts. First, confirm room proportions, ventilation, drainage, and appliance positions before ordering units.
Protect exposed beams, panelling, fireplaces, and plasterwork, integrating cabinetry discreetly around them.
Next, complete Material sourcing for timber, stone, tiles, ironmongery, and sanitaryware; reclaimed or traditionally made pieces can match the property more convincingly than generic substitutes. Use contemporary fittings where they improve safety and efficiency, but select understated forms, aged finishes, and reversible fixings.
Then restore or reproduce Historic details, including skirting, cornices, doors, and architraves, after major installations finish.
Finally, apply breathable paints, limewash, traditional joinery finishes, and period-appropriate flooring to unify each room without manufacturing false age.
Complete Snagging and Close the Project
Before handover, walk through the completed restoration room by room and record every defect, omission, or finish that falls short of the agreed specification. Photograph each item, reference its location, and separate urgent safety issues from cosmetic corrections.
Check joinery, plasterwork, paint lines, hardware, glazing, flooring, and services against your schedule and conservation requirements.
Ask your contractor to confirm responsibility, costs, and completion dates before you approve the snagging list.
Once corrections are finished, inspect them in the same sequence, testing appliances, heating, lighting, drainage, alarms, and locks.
Review cleaning carefully; dust mustn’t obscure flaws or damage fragile fabric.
Compile warranties, certificates, manuals, invoices, and as-built records.
Finally, obtain written sign-off, retain agreed sums until completion, and archive photographs and decisions supporting Historic preservation and interior detailing.
Conclusion
By the time your period property restoration reaches the finish line, you’ll have survived surveys, permissions, specialists, leaking roofs, hidden wiring, and at least one “minor” discovery that costs a small fortune. Complete the snagging, secure approvals, catalogue every repair, and hand over the records. Then step back and admire your carefully preserved heritage—ideally without disturbing anything. After all, in an old house, even success must respect the past, preferably before it invents another problem.

