

Restoring original timber beams safely starts with restraint: you’ll first document their tool marks, joinery, finishes, and visible defects before touching the surface. You’ll then assess moisture, insect activity, and structural weakness using gentle, non-destructive methods. Because historic fabric can conceal serious hazards, you’ll need to recognize when a qualified professional should intervene. From compatible materials and careful cleaning to discreet repairs and ongoing monitoring, each decision matters—and the first inspection may reveal more than expected.
Key Takeaways
- Inspect and document beam dimensions, defects, tool marks, joinery, finishes, repairs, and historic fabric before intervention.
- Test moisture, insects, decay, movement, cracking, joints, and deflection using non-destructive methods and regular measurements.
- Consult conservation-minded timber professionals when damage is extensive, concealed, structurally significant, or access is unsafe.
- Use compatible, reversible repairs with matching timber, grain, moisture content, traditional joinery, and discreet fasteners.
- Clean gently, avoid concealing deterioration, preserve authenticity, and maintain annual photographic records for ongoing monitoring.
Inspect Original Timber Beams for Damage
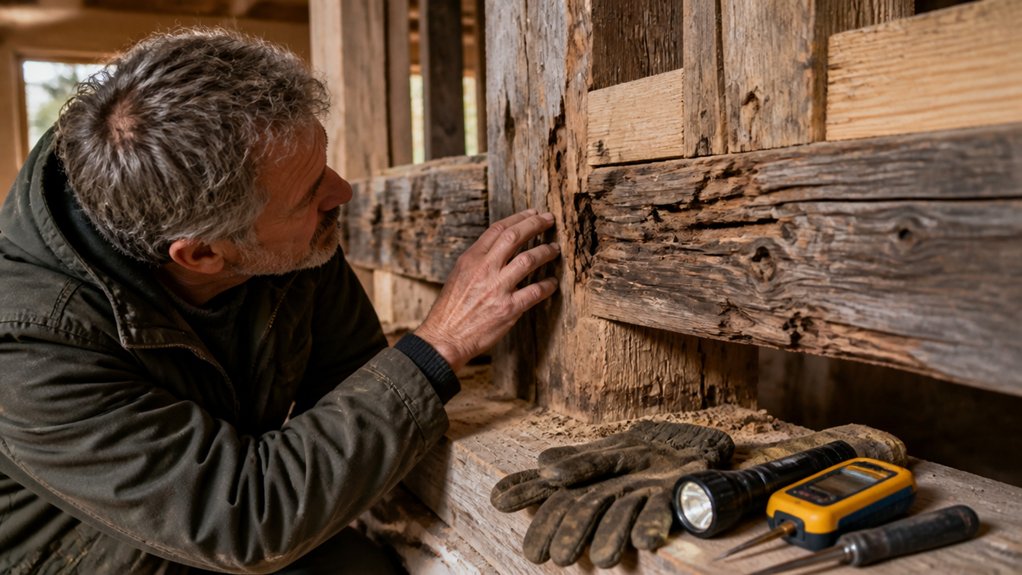
Before you begin restoration, inspect every original timber beam for signs of structural or biological damage. Begin with a careful visual survey, noting splits, crushing, deflection, failed joints, chisel marks, and altered sections.
Use a torch and mirror to examine concealed faces without removing historic fabric unnecessarily. Record each beam’s location, dimensions, species, tool marks, repairs, and condition on annotated drawings or photographs.
Distinguish original work from later replacements, since historical significance often resides in modest, altered members as well as prominent framing.
Consider aesthetic considerations, including patina, surface texture, and traditional finishing, before proposing intervention. Don’t plane, sand, or replace timber merely to improve appearance.
Mark areas requiring specialist assessment, then consult a conservation engineer who can recommend the least intrusive, reversible treatment while preserving evidence of craftsmanship and use.
Test for Moisture, Insects, and Weakness
To test original timber beams for moisture, insects, and weakness, begin with non-destructive methods that preserve historic fabric. Use a moisture meter at several points, recording readings near joints, roof leaks, and masonry contacts. Compare results with dry areas rather than relying on one measurement.
Look for fresh frass, pinholes, galleries, shed wings, and soft, blistered fibers that may indicate active insects or decay. Tap the beam gently with a small wooden mallet; a dull response can signal internal deterioration, while probing vulnerable edges with an awl reveals surface softness.
Document every finding with photographs and measurements. Don’t sand or strip historic surfaces before testing, since coatings and tool marks provide evidence.
Base any wood treatment on confirmed conditions, and plan structural reinforcement only after you’ve mapped sound and compromised timber.
Know When to Call a Professional
Call a conservation-minded timber professional when a beam shows deep decay, extensive insect activity, movement, cracking near joints, or deflection that suggests structural weakness. Don’t rely on surface appearance or a quick patch when the beam carries floors, roofs, or masonry.
A qualified specialist can assess load paths, distinguish historic fabric from later alterations, and recommend proportionate intervention. Seek help, too, if moisture remains unresolved, access is unsafe, or damage extends into concealed connections.
Discuss Historical accuracy before approving replacement: the least invasive solution may preserve more original timber and evidence of traditional workmanship. Include aesthetic considerations, since visible repairs should respect the beam’s age, tool marks, texture, and surrounding finishes.
Document findings, request references, and obtain a written scope before work begins. Your judgment protects both safety and heritage.
Match Tools and Materials to the Repair
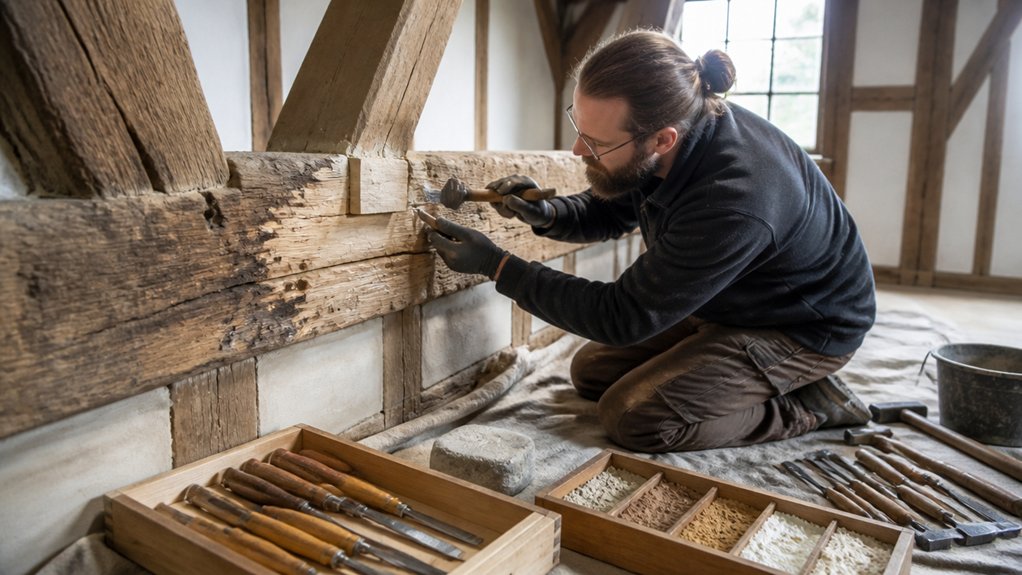
Before choosing supplies, assess the beam’s decay, load, grain, and historic finish.
Select compatible timber, consolidants, and fasteners that preserve its character without introducing damaging materials.
Use tools suited to the repair’s scale, and don’t remove sound wood unnecessarily.
Assess Beam Condition
When you assess an original timber beam, look beyond surface damage to determine whether decay, insect activity, moisture, or structural movement has weakened the wood. Probe suspect areas gently with an awl, inspect joints and bearing ends, and record cracks, deflection, staining, and hollow sounds. Measure moisture readings and photograph every finding before disturbing historic fabric.
Check the beam’s connection to walls, floors, and roof framing; movement or crushed wood may signal a broader structural problem. Historical significance should guide your restraint: tool marks, joints, and old repairs can reveal construction history and deserve preservation.
Consider aesthetic considerations alongside safety, since visible patching may alter the room’s character. If damage affects load capacity, stop work and consult a qualified conservation engineer before choosing tools or undertaking repairs.
Select Compatible Materials
Choose materials that respect the beam’s age, structure, and moisture behavior rather than defaulting to modern substitutes. Select replacement timber with similar species, grain direction, density, and moisture content.
Reclaimed wood can preserve Historical accuracy, but inspect it for insects, decay, chemicals, and hidden metal before installation.
Match repairs carefully: use traditional lime-based mortar near masonry, breathable finishes on exposed surfaces, and compatible fasteners that won’t accelerate corrosion or split old fibers.
Avoid impermeable epoxy coatings, cement-rich fillers, and pressure-treated wood unless a conservation specialist confirms their necessity.
For Wood treatment, choose a low-toxicity preservative suited to the species and intended environment, then test it on an inconspicuous area.
Document product names, colors, and applications so future caretakers can understand your choices and maintain the beam appropriately.
Choose Appropriate Tools
With compatible materials selected, match your tools to the beam’s condition and the repair’s scale. Use a sharp hand plane, chisels, and rasps for controlled shaping that respects historic tool marks.
Choose a soft-bristle brush and a low-suction vacuum to remove dust without abrading softened fibers.
For probes, select an awl or inspection pick, but test discreetly and avoid widening sound cracks.
Apply consolidants or fillers with small spatulas, syringes, and disposable brushes sized for precise placement.
Keep abrasives fine and use them sparingly; aggressive sanding can erase evidence of age and reduce Historical accuracy.
If you’re recreating Decorative finishes, reserve separate brushes and clean containers to prevent contamination.
Before work begins, sharpen, clean, and test every tool on matching scrap timber.
Document your choices and results.
Clean Timber Beams and Repair Damaged Joints
Before you clean original timber beams, document their tool marks, joinery, finishes, and areas of decay so the restoration preserves evidence of their construction and use.
Vacuum loose dust with a soft brush attachment, then wipe cautiously with a barely damp, pH-neutral cloth.
Test every method in an inconspicuous area; aggressive sanding or chemical stripping can erase Historical accuracy and Decorative finishes.
Don’t expose sound wood merely to achieve uniform color.
For damaged joints, identify movement, insect loss, and failed repairs before intervening.
Remove loose material by hand, retain sound fragments, and use reversible, compatible timber repairs where possible.
Match replacement wood’s species, grain, moisture content, and age characteristics.
Secure joints with traditional methods or discreet fasteners, avoiding unnecessary alteration to original fabric.
Let a qualified conservator handle structural instability or extensive decay.
Protect and Monitor Restored Timber Beams
Once cleaning and joint repairs are complete, protect the beams by controlling the conditions that threaten their historic fabric. Keep roof leaks, plumbing failures, and rising damp from reintroducing moisture. Maintain stable humidity and temperature, and improve ventilation without sealing the timber behind impermeable coatings.
Choose breathable finishes compatible with the building’s age and existing evidence. For Timber preservation, inspect surfaces regularly for fungal growth, insect exit holes, cracking, and fresh staining. Don’t conceal problems with paint or cladding.
Where movement or load demands exceed the original capacity, consult a conservation engineer before adding Structural reinforcement; discreet, reversible solutions should preserve historic fabric and avoid unnecessary cutting.
Record repairs, materials, and readings, then photograph the beams annually. You’ll detect change early and protect both safety and authenticity.
Conclusion
Restoring original timber beams is a careful conversation with the past. You’ll inspect every tool mark, test quietly for moisture and insects, and repair only what safety requires. Compatible timber, reversible fixings, and gentle cleaning will preserve the beam’s historic character while strengthening its joints. Record each step, then monitor the work as seasons change. With patience and professional help when needed, you’ll safeguard these old structural storytellers for generations without erasing their time-worn voice.

