

Before you strip historic lime plaster, establish what’s failed and what can be conserved. Tap the surface gently, inspect cracks and hollows, and remove only loose material with small hand tools. Clean the exposed edges and background without eroding sound plaster, then rebuild with compatible lime mixes in thin coats. Control drying and protect the work from frost. The most important decisions, however, begin before the first piece is removed.
Key Takeaways
- Assess and document cracks, hollows, damp, salts, detachment, composition, and previous repairs before removing any plaster.
- Remove only loose material, working from defect edges inward with small wooden or hand tools and minimal pressure.
- Clean and prepare sound edges carefully, preserving stable fragments, historic tool marks, lath, and firmly bonded plaster.
- Dampen the background and apply compatible lime plaster in thin, scored coats, avoiding cement and excessive thickness.
- Cure repairs slowly, protect them from frost and rapid drying, then match the surrounding texture without concealing historic evidence.
Check Lime Plaster Before Removing It
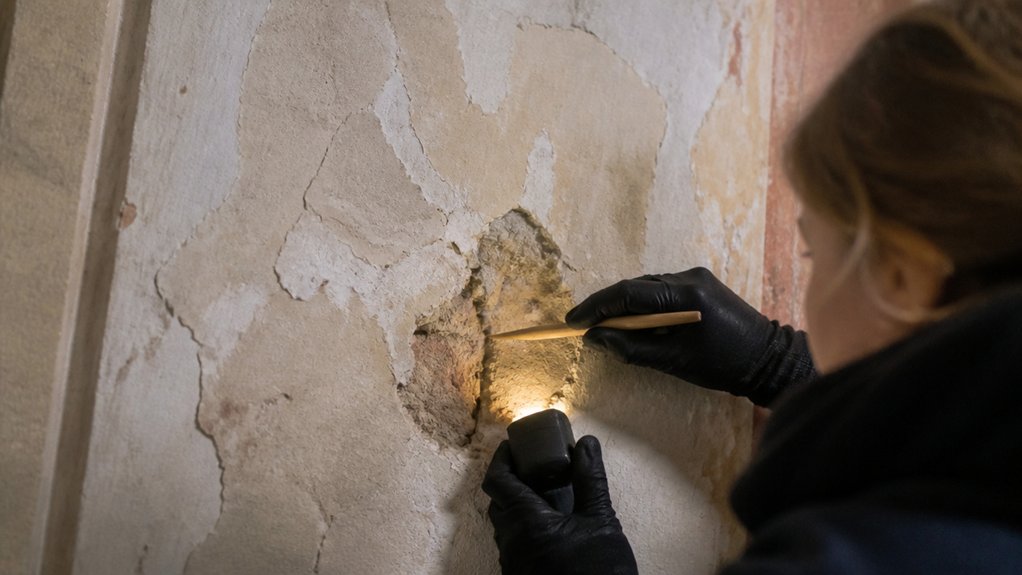
Before removing any historic lime plaster, assess its condition and determine whether it can be repaired in place. Examine cracks, hollows, staining, powdering, and areas that have detached from the substrate. Tap gently with your fingers or a wooden tool to identify drummy sections, but don’t probe sound surfaces.
Check for movement, moisture sources, salts, and structural settlement before deciding that plaster requires intervention. Understand the Lime plaster composition, including its aggregate, binder, fibres, and any later cement-rich repairs; differences can explain failures and guide compatible treatment.
Record defects with photographs, measurements, and notes, then map their locations.
Use Historical preservation techniques such as close visual inspection, moisture assessment, and small, discreet test areas. Consult a conservator when evidence remains uncertain, especially in listed or archaeologically significant buildings.
Remove Failed Plaster Without Damaging the Wall
Once you’ve confirmed that plaster has failed and recorded its condition, remove only the loose material, working from the edges of each defect toward the centre. Use a small pointing trowel, plasterer’s knife, or wooden tool, applying gentle pressure and letting the material release naturally. Don’t lever against sound plaster, rake joints, or enlarge the opening simply to make it neater.
Stop immediately when you meet firm, well-bonded material. A vacuum with controlled suction can collect dust, but avoid aggressive brushing that could erode the surface. Follow established Lime plaster techniques, adapting your approach to the wall’s construction and condition.
Your Historical wall analysis should guide every decision, especially where movement, damp, or earlier repairs may have weakened surrounding areas. Keep the exposed defect protected, and don’t disturb sound finishes beyond the failed section.
Prepare Old Edges and Wall Backgrounds
With the failed plaster removed, prepare the exposed edges and wall background without widening the defect. Begin your lime plaster evaluation by checking whether the remaining plaster sounds firm when tapped and remains bonded under gentle pressure.
Trim only loose crumbs with a sharp plugging chisel or scraper; don’t square, deepen, or enlarge sound material. Brush away dust using a soft natural-bristle brush, then vacuum carefully without abrading the surface.
Your historic wall assessment should identify open joints, friable mortar, salt deposits, damp staining, and any exposed lath or masonry. Record these conditions before cleaning further.
Remove powdery material, but preserve embedded fragments and original tool marks wherever they remain stable. Keep the background evenly clean, not polished.
If moisture or structural movement persists, pause and resolve its cause before continuing with the repair.
Apply Compatible Lime Plaster in Thin Coats

After the background is clean, stable, and suitably dampened, apply a compatible lime plaster in thin coats rather than filling the defect in one heavy lift.
Choose a mix whose binder, aggregate, colour, and texture suit the surviving plaster; avoid strong cement additions that can trap moisture or stress historic fabric.
Press the first coat firmly into the background, maintaining an even application thickness of roughly 5–8 mm, depending on the repair depth and mix guidance.
Score its surface lightly to provide a mechanical key, without cutting into the wall.
Allow the coat to become firm but not fully dry before adding the next.
Keep each subsequent layer similar in strength or slightly weaker than the one beneath, and build out gradually until the repair sits just below the surrounding surface.
Cure, Finish, and Maintain the Repair
Let the finished repair cure slowly and evenly, protecting it from direct sun, strong draughts, frost, and rapid heating while retaining gentle ventilation. Effective Lime plaster curing prevents shrinkage, cracking, and weak surfaces. Lightly mist the plaster if it begins to dry too quickly, but don’t saturate it. Follow the plasterer’s recommended curing period before decorating or applying further coats.
For Lime plaster finishing, use a wooden float or sponge only when the surface has firmed sufficiently; avoid overworking it, which can draw fines to the face and reduce breathability. Match the surrounding texture without disguising historic evidence.
Once fully cured, choose vapour-permeable limewash or mineral paint, not impermeable modern coatings. Inspect the repair seasonally for hairline cracks, damp staining, or salt deposits. Address moisture sources promptly, and make small compatible repairs before deterioration spreads. Never seal a sound lime surface unnecessarily.
Conclusion
Historic lime plaster rewards restraint. Check before you strip, remove only what’s failed, and leave sound fabric undisturbed. Prepare edges carefully, then rebuild with compatible lime in thin coats, allowing each layer to breathe and cure slowly. Think of the wall as an old book: when conservators repair a torn page, they don’t replace the whole volume—they preserve its evidence. Protect your repair from frost, heat, and rapid drying, and you’ll safeguard both its performance and history.

