
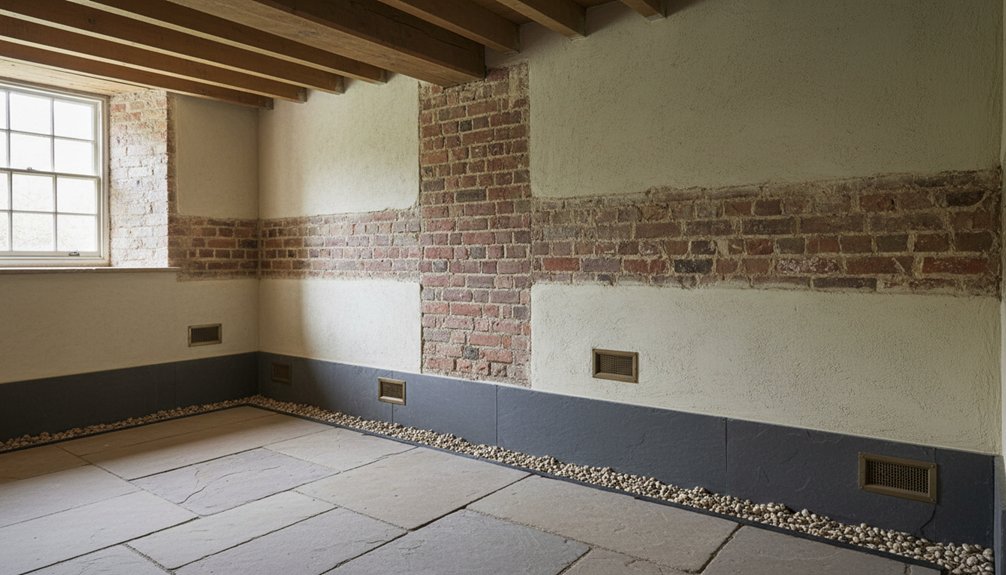
You may not realise that what looks like rising damp in a Georgian basement often comes from blocked drainage, condensation, or salts within old masonry. Before you treat the walls, you need to confirm the moisture’s route and protect the building’s breathable construction. External drainage, groundwater control, lime-based repairs, and balanced ventilation can reduce damp without sealing historic fabric—provided you address the cause rather than the symptom. The first inspection usually reveals where that work must begin.
Key Takeaways
- Diagnose moisture accurately by mapping damp patterns, checking salts, and ruling out leaks, condensation, and rain penetration.
- Improve drainage by directing rainwater away, maintaining gutters and downpipes, and relieving groundwater pressure with accessible systems.
- Preserve breathable masonry by avoiding cement renders, waterproof coatings, gypsum boards, and other moisture-trapping materials.
- Repair walls using compatible lime mortar, breathable lime plaster, and mineral finishes applied in fully cured layers.
- Maintain steady ventilation and background heating, then monitor moisture readings and visible symptoms consistently after treatment.
Identify the Signs of Rising Damp in Georgian Basements
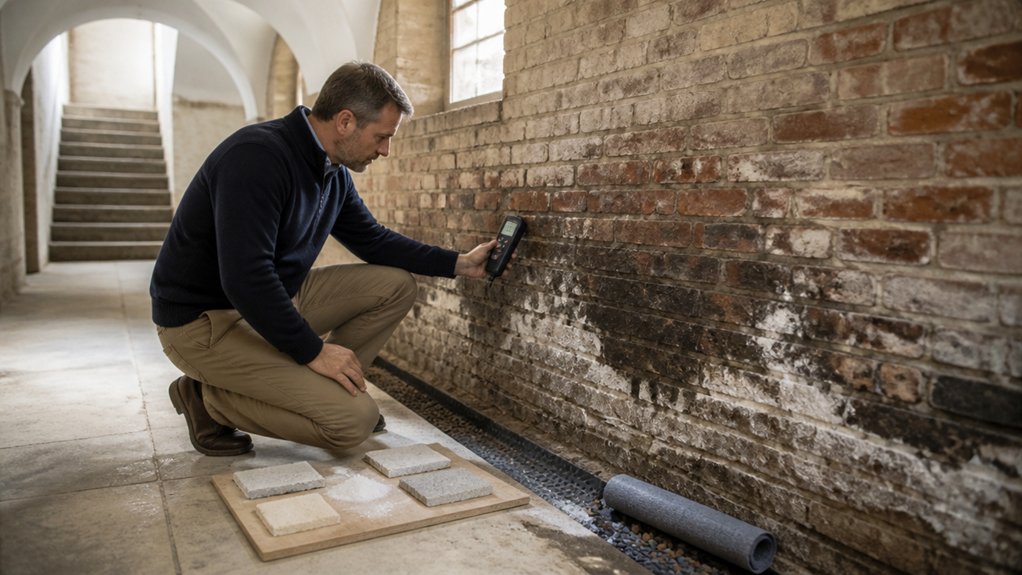
If you’re evaluating a Georgian basement, look for a tide mark or band of peeling paint rising from the floor, salt deposits on brickwork, and damp, friable plaster concentrated along the lower wall.
Note whether deterioration follows a fairly even horizontal zone, rather than appearing around one isolated defect. Probe suspect plaster gently; softened surfaces and powdering may indicate prolonged moisture exposure.
Check skirtings, joinery ends, and floor edges for swelling, staining, or decay, while recognising that historic finishes can disguise earlier repairs.
Record observations with photographs, measurements, and a simple elevation sketch before disturbing anything.
Historical preservation depends on reading the building carefully, not stripping sound fabric unnecessarily.
Keep aesthetic considerations in view: breathable lime finishes, original brickwork, and patinated surfaces often carry greater significance than a uniformly renewed appearance.
Confirm the Cause Before Treating Damp
Before treating damp, you’ll need to inspect plumbing, ground levels, rainwater goods, and other moisture sources.
Distinguish true rising damp from penetrating or condensation-related moisture through targeted inspection and testing.
Assess the basement’s construction, including solid walls, floors, and historic finishes, so your remedy protects the building’s fabric.
Inspect Moisture Sources
Why treat rising damp until you’ve confirmed where the moisture comes from? Begin with a careful inspection, not a prescription.
In Georgian basements, record staining, salts, plaster failure, and damp patterns across walls, floors, corners, and junctions.
Check gutters, downpipes, drains, paving, external ground levels, and nearby plumbing for leaks or splashback.
Indoors, inspect ventilation, heating, condensation risk, and stored materials that may trap moisture against historic finishes.
Use moisture readings comparatively, alongside temperature and humidity data, rather than treating one meter result as proof.
Trace moisture migration through construction details, including solid brickwork, mortar joints, suspended floors, and service penetrations.
Photograph findings and map them on a simple plan.
This evidence-led process respects historical architecture and helps you choose the least invasive remedy, protecting fabric before intervention begins.
Distinguish Rising Damp
Once you’ve mapped the moisture, test whether its pattern truly indicates rising damp rather than condensation, penetrating rain, plumbing leaks, or salts within the masonry.
Look for a fairly continuous tide mark, greatest moisture at floor level, and readings that diminish with height. Compare results across several walls and seasons; a single damp patch proves little.
Check whether hygroscopic salts are attracting moisture from humid air, creating misleading meter readings and damaged finishes. Don’t diagnose from a handheld meter alone: combine readings with visual evidence, salt analysis, and careful monitoring.
If moisture follows a chimney breast, window reveal, or isolated service route, investigate another source first.
Accurate diagnosis protects Historical accuracy and supports aesthetic preservation, helping you avoid unnecessary opening-up, cement repairs, or irreversible chemical treatment.
Record every finding before specifying conservation work.
Assess Basement Construction
Assess how the basement was built before treating damp: inspect its age, wall materials, floor construction, joints, drainage, and any original or later waterproofing. Historical construction often explains moisture patterns better than a quick moisture-meter reading.
Check whether Georgian walls use porous brick, lime mortar, rubble, or later cement repairs; impermeable patches can trap water and force it through adjoining masonry.
Examine floors for suspended timber, brick, flagstones, or modern concrete, noting how each meets the walls.
Trace gutters, downpipes, external ground levels, drains, and ventilation routes, then look for bridging across any damp-proof course.
Record cracks, bulging, salt deposits, and staining, but don’t assume they prove rising damp.
Assess Foundation stability and structural movement before specifying work.
A conservation-led survey should distinguish groundwater, leaks, condensation, and trapped moisture, preserving breathable fabric wherever possible.
Understand the Risks of Chemical Damp-Proof Courses
Chemical damp-proof courses can seem like a straightforward cure for rising damp, but they carry risks in older and traditionally built walls. Injecting chemicals into Georgian brick or soft lime mortar can disrupt vapour movement, trap moisture, and accelerate salt damage.
You may also create isolated damp patches when the wall’s construction doesn’t provide a continuous injection route. Drilling can fracture fragile joints and remove historic fabric, while failed treatments can leave you with costly repairs and little improvement.
Ask for moisture mapping, salt analysis, and a conservation-led diagnosis before accepting an injection specification. Consider chemical alternatives that respect the wall’s breathability and reversibility, and assess each product’s environmental impact, including manufacture, toxicity, and disposal.
A sound remedy should address evidence, not simply conceal symptoms.
Manage Drainage and Groundwater Without Sealing Walls
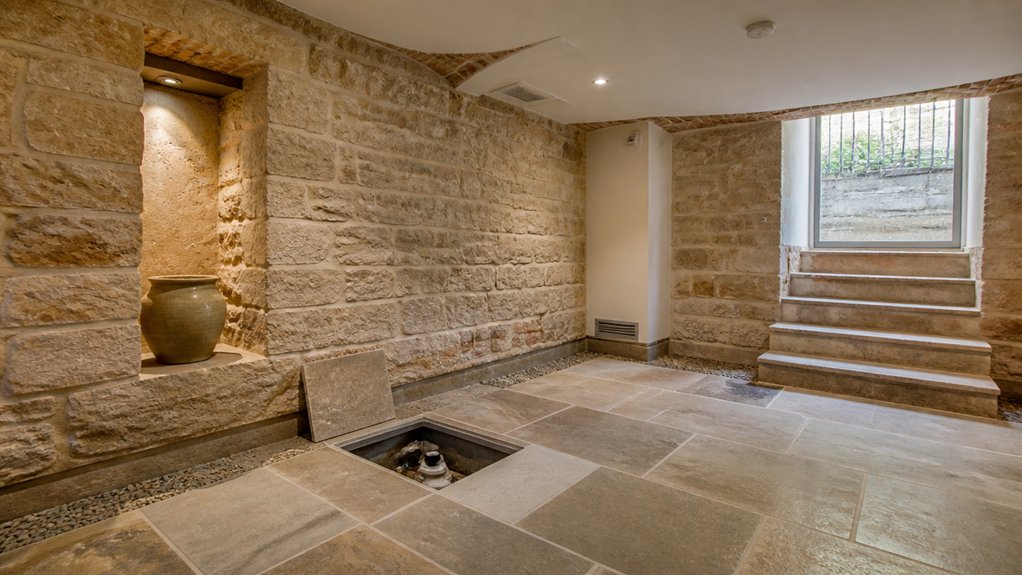
You’ll reduce rising damp by improving external drainage, keeping rainwater away from the wall base and foundations.
Control groundwater pressure with carefully designed land drains or sumps, without forcing moisture into vulnerable masonry.
This approach preserves the wall’s breathable fabric rather than sealing it behind impermeable coatings.
Improve External Drainage
Improve external drainage by directing rainwater and groundwater away from the building rather than sealing the walls and trapping moisture within them.
Begin with outdoor grading: shape permeable ground so it falls gently away from the Georgian façade, while preserving historic paving, steps, and thresholds. Avoid impermeable concrete aprons that can concentrate water beside old masonry.
Inspect gutters, valleys, and downpipes regularly. Effective gutter maintenance means clearing leaves, repairing joints, and securing outlets before leaks saturate the wall base.
Extend downpipes into suitable soakaways or rain gardens, where site conditions permit, using discreet, reversible connections that respect the building’s appearance.
Keep discharge points clear and check them after heavy rainfall. Replace damaged gullies and reset loose paving without disturbing original fabric unnecessarily.
These straightforward measures reduce wetting, allow the walls to breathe, and support traditional materials without chemical injection.
Control Groundwater Pressure
Control groundwater pressure by giving subsurface water a safe route away from the Georgian façade, rather than sealing the masonry and forcing moisture higher.
Start with a Structural assessment to identify hydrostatic loading, blocked channels, high water tables, and vulnerable joints.
Your drainage design might include a discreet perimeter drain, a correctly graded sump, or a maintainable pump system, subject to consent and site constraints.
Use inspection chambers so you can clear sediment and verify performance without disturbing historic fabric.
Where ground levels or adjoining properties restrict excavation, consult a conservation engineer before selecting a low-impact alternative.
Historical restoration demands measured intervention: test flow paths, monitor basement humidity and water levels, and adjust the system seasonally.
Don’t rely on impermeable coatings to resist pressure; remove the cause and keep drainage accessible for future maintenance.
Preserve Breathable Wall Fabric
Once drainage has reduced groundwater pressure, preserve the Georgian wall’s ability to release residual moisture through its original, breathable fabric. Don’t trap dampness behind cement render, waterproof coatings, or dense modern plaster.
Instead, ask a conservation specialist to inspect the masonry, mortar joints, and previous repairs before removing incompatible finishes. Repoint locally with a compatible lime mortar, matching the existing brick or stone and allowing vapour movement.
Choose breathable materials, such as lime plaster and mineral paint, for internal finishes; avoid gypsum boards fixed tightly against wet walls.
Maintain ventilation, gentle background heating, and clear air gaps around stored items. Monitor moisture seasonally, recording changes rather than reacting to isolated readings.
This approach supports Historical preservation while helping you manage groundwater without sealing the wall or accelerating salt damage.
Restore Walls With Breathable Lime Finishes
When rising damp has been addressed, restore affected walls with breathable lime plaster and mineral-based finishes that allow residual moisture and salts to escape.
Remove failed cement render carefully, preserving sound historic fabric and avoiding unnecessary loss of original brick or stone.
Dampen the background lightly, then apply compatible coats, allowing each layer to carbonate fully before adding the next.
Choose Lime plaster formulated for the substrate, aggregate, and exposure; a soft, vapour-open mix generally suits Georgian masonry better than dense cement products.
Finish with thin coats of limewash or other Breathable coatings, rather than vinyl paint, which can trap moisture and encourage salt damage.
Match texture and colour through discreet trial panels, and keep repairs visually subordinate.
Where salts remain active, allow sacrificial finishes to weather and renew them periodically.
Balance Basement Ventilation, Heating and Humidity
Good ventilation, steady low-level heating, and controlled humidity help a basement dry without stressing historic masonry. You’ll protect lime plaster and timber by avoiding rapid temperature changes, which can drive condensation onto cold walls. Use gentle, continuous background heat rather than short bursts, and keep furniture slightly clear of external walls so air can circulate.
Your Ventilation strategies should remove moisture at source: run extract fans during cooking, washing, or laundry, then allow replacement air through discreet vents or controlled window opening. Don’t seal historic fabric with impermeable coatings or block existing air paths.
A small dehumidifier may assist during exceptionally damp periods, but set it conservatively and clean its filter regularly.
Maintain comfortable Indoor air quality by balancing fresh-air exchange with warmth, avoiding draughts that chill masonry and increase condensation risk.
Track Moisture Levels After Treatment
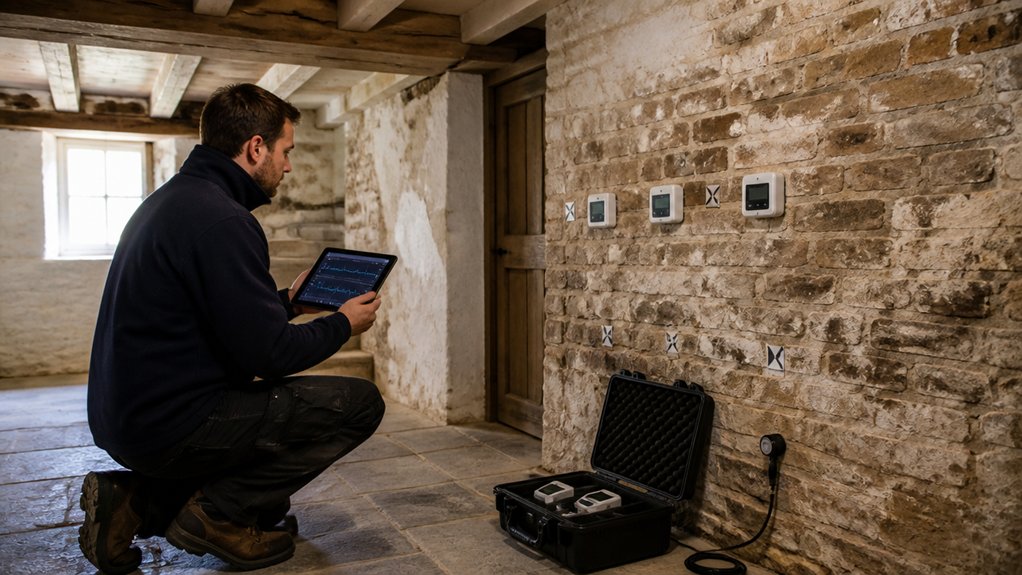
After treatment, track moisture levels at consistent points so you can confirm that the damp pattern is improving rather than simply shifting within the wall. Record readings at the same height, depth, and time of day, noting recent weather, heating, and ventilation.
Moisture sensors can provide repeatable data without drilling intrusive holes into historic masonry. Use them alongside visual inspections for salts, staining, flaking finishes, and changes in mortar condition.
Humidity monitoring helps distinguish rising moisture from condensation caused by cool surfaces or poor air movement.
Compare results weekly at first, then monthly as conditions stabilise. Don’t chase isolated readings; look for sustained trends across the basement.
Keep a simple log, and ask a conservation professional to review persistent or worsening moisture before altering finishes or opening fabric.
Conclusion
When you care for a Georgian basement, you’re not simply chasing stains—you’re guiding moisture back towards its natural path. Keep gutters clear, manage groundwater discreetly, and let lime walls breathe rather than trapping damp behind harsh chemical barriers. With measured ventilation, steady heating, and regular moisture checks, you’ll see the building settle like a well-tuned instrument. Treat each repair gently, and the basement’s historic fabric will stay sound, useful, and quietly resilient for generations.

