

Restoring a Georgian stucco façade often begins where earlier repairs have quietly fallen short. You’ll need to identify its original character, survey every elevation, and assess cracks, damp, movement, and hidden risks before touching the surface. From there, compatible lime materials, careful removal, masonry repairs, and accurate moulding work will guide the process. The right texture, colour, drainage, and maintenance plan matter just as much—and the first inspection may reveal more than expected.
Key Takeaways
- Survey every elevation, mapping cracks, damp, detachment, biological growth, ornament damage, and previous incompatible repairs.
- Assess structural movement and moisture sources before repairs, checking masonry, gutters, flashings, downpipes, ventilation, and ground drainage.
- Remove only loose stucco with hand tools, protecting sound material, masonry, and decorative features while documenting exposed conditions.
- Use compatible, vapour-permeable lime mortars and matching masonry units; avoid hard cement repairs and impermeable coatings.
- Recreate mouldings, texture, and colour from surviving evidence, using templates, sample panels, discreet fixings, and detailed intervention records.
Identify Georgian Stucco and Its Damage
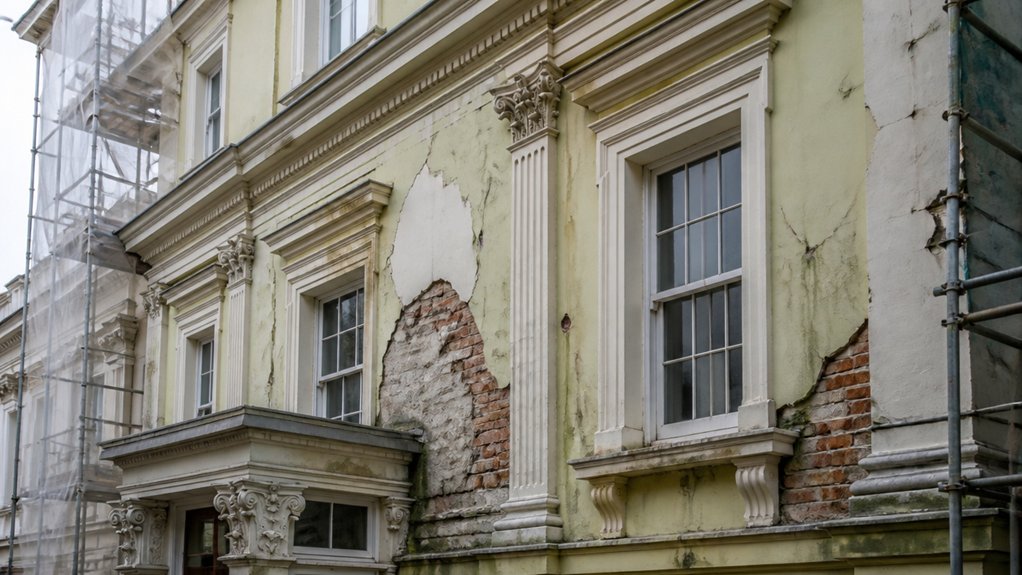
Before planning repairs, identify Georgian stucco by its refined symmetry, smooth lime-based finish, and restrained classical detailing around doorways, windows, cornices, and quoins.
Consider the building’s Historical context: Georgian façades typically use breathable lime render, often layered over masonry and finished with mineral washes or paint.
Through Material analysis, distinguish original stucco from later cement patches, acrylic coatings, and modern replacement details.
Examine damage by type, not severity: map hairline shrinkage cracks, open joints, blistering, flaking, staining, biological growth, and detached areas.
Note whether ornament remains crisp, softened, or fractured, and compare exposed layers at existing losses.
Look for repeated repair materials, incompatible textures, and altered profiles that obscure the original design.
Record each observation with photographs, measurements, and precise location references, but don’t infer structural causes yet.
Survey the Façade and Assess Risk
Start the survey from a safe distance, then work systematically across the façade, recording orientation, height, exposure, and the condition of each rendered and ornamental element.
Use binoculars before planning close inspection, and photograph every elevation in consistent light.
Mark bays, cornices, string courses, pilasters, window surrounds, and later alterations on a scaled elevation drawing.
Note access constraints, fragile projections, loose-looking finishes, overhead hazards, and areas requiring exclusion zones.
Don’t climb, probe, or remove material until a competent professional has assessed safe working methods.
Research the building’s Historical context, original materials, previous repairs, and listed-building requirements; consult archives where available.
Compare observations with conservation records, and rank hazards by urgency and consequence.
Record your findings clearly, so your preservation techniques respect surviving fabric and guide proportionate, reversible intervention.
Diagnose Cracks, Damp, and Movement
When you’ve completed the initial survey, diagnose each crack, damp mark, and sign of movement in relation to the façade’s construction and history. Map every defect, recording its width, direction, length, and position against openings, quoins, cornices, and joints.
Note whether cracks remain stable, widen seasonally, or show stepped patterns that indicate masonry movement. Check for bulging, displacement, hollow areas, and failed junctions around later alterations.
Trace damp marks to their source rather than treating surface staining alone: inspect gutters, flashings, downpipes, ground levels, and ventilation to identify moisture infiltration.
Compare readings from repeat inspections, using tell-tales or gauges where movement remains uncertain. Distinguish structural action from shrinkage, thermal change, impact, or historic settlement.
Photograph details consistently, and consult archival evidence before specifying remedial work.
Choose Compatible Lime Repair Materials
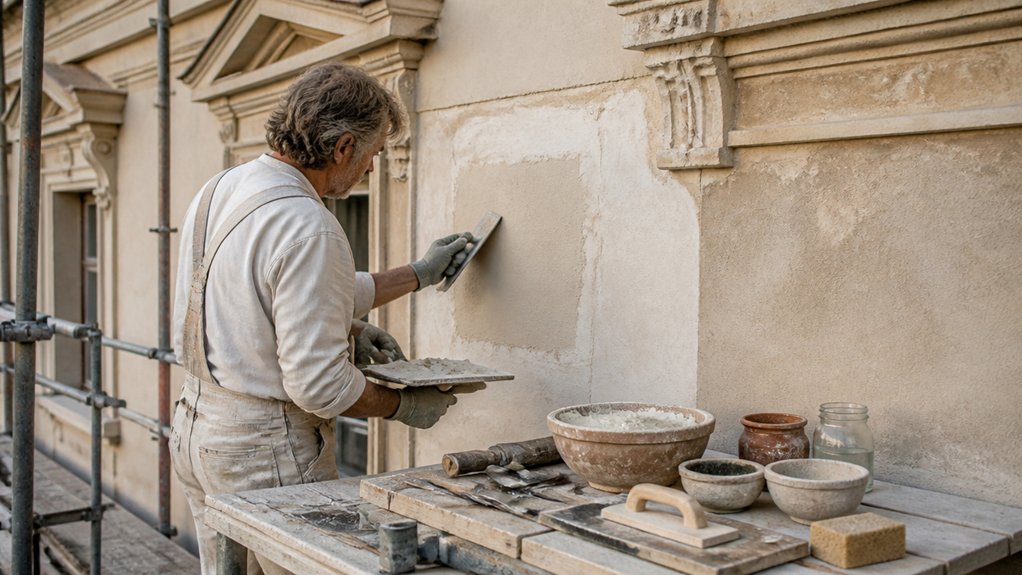
Choose lime repair materials that match the original façade’s composition, strength, texture, and vapour permeability rather than defaulting to modern cement products. Begin by testing surviving samples, recording their aggregate size, colour, binder type, and finish.
Select a Lime mortar with comparable flexibility and breathability, allowing moisture to migrate through the coating instead of becoming trapped behind it. Match the mortar’s strength to the historic substrate; a harder mix can accelerate cracking and surface loss.
Specify well-graded, locally appropriate aggregates, and use natural hydraulic lime only where exposure or curing conditions require it. Consider Compatible additives, such as brick dust or pozzolans, but confirm their historic suitability and dosage before mixing.
Prepare small trial panels, then assess colour, texture, adhesion, and weathering after curing. Document your final specification for consistent repairs.
Remove Failed Stucco Safely
First, assess loose stucco carefully, distinguishing failed areas from sound historic fabric.
Protect surrounding masonry, joinery, and ornamental features before work begins.
Then remove only delaminated layers with controlled hand tools, preserving firmly bonded material for compatible repairs.
Assess Loose Stucco
Before removing any material, map the façade and test each area with a gloved hand and gentle tapping to distinguish sound stucco from hollow, bulging, or friable sections. Mark defects directly on a measured elevation, noting their size, depth, and relationship to joints, openings, and earlier repairs.
Compare each patch’s stucco color and surface texture with adjacent historic work; subtle differences may reveal incompatible cement, moisture damage, or previous loss. Use a thin probe only where the surface already shows failure, and stop when you reach firm, well-bonded material.
Record cracks, drummy sounds, powdering, and movement with photographs and concise notes. Don’t widen defects simply to make them easier to see.
Your assessment should define the minimum removal area while preserving stable original fabric and guiding later mortar matching.
Protect Surrounding Features
Once failed areas are defined, protect adjacent historic stucco, masonry, trim, windows, and painted features with breathable coverings secured without driving fasteners into sound fabric. Overlap sheets to shed dust and fragments, but leave ventilation gaps so trapped moisture won’t damage vulnerable finishes. Mask window glass with removable protection, keeping tapes off historic paint, soft putty, and fragile joints.
Install landscaping barriers below the work zone to prevent falling debris from crushing planting beds or contaminating soil. Wrap nearby light fixtures, signs, and rainwater goods without restricting movement or drainage.
Shield decorative elements, including brackets, carved surrounds, and ironwork, with padded, breathable materials rather than rigid plastic pressed against surfaces. Mark protected areas clearly, and brief every worker on boundaries, access routes, and hand-tool limits.
Inspect coverings throughout the work, replacing torn or wet protection promptly.
Remove Delaminated Layers
How can you tell which stucco must go? Tap the façade lightly with a wooden mallet. Retain firm areas that sound solid; mark hollow, drummy patches for removal. Inspect cracks, bulges, layer peeling, and damp edges, then identify surface contamination that may obscure failing material. Don’t pry sound Georgian mouldings or surviving tooling.
Before work begins, photograph each elevation and map defects. Wear eye protection, gloves, and respiratory protection, especially when dust or historic coatings are present. Start at a confirmed failure and work inward with a sharp bolster, thin chisel, or hand scraper. Use controlled, shallow blows; never attack the substrate aggressively. Stop when you reach sound, well-bonded plaster.
Keep edges neat but irregular enough to key the repair. Bag debris promptly, and record exposed brick, lath, and bonding conditions for the repair specification.
Repair Masonry and Control Moisture
Sound stucco restoration begins with the masonry beneath it: repair cracked joints, replace failed units with compatible materials, and correct drainage problems before applying new finishes.
Survey the wall systematically, recording open joints, displaced bricks, salt deposits, and damp zones.
Rake deteriorated mortar by hand, preserving sound edges, then repoint with a breathable mix suited to the historic masonry.
Prioritize Material compatibility: overly hard cement mortar can trap moisture and damage softer Georgian brick.
Replace failed units with matching size, density, texture, and firing characteristics to maintain Historical accuracy.
Trace leaks to their source; clear blocked gutters, repair flashings, renew defective downpipes, and improve ground drainage where necessary.
Allow masonry to dry gradually, and don’t seal damp walls with impermeable coatings.
Confirm repairs remain stable before reinstating stucco.
Recreate Georgian Mouldings and Details

With the masonry dry and stable, you can recreate Georgian mouldings and decorative details with greater accuracy. Begin by studying surviving fragments, historic photographs, measured drawings, and adjacent properties. Record each profile, projection, joint, and fixing point before removing damaged material.
Prioritise historical accuracy over convenient modern substitutes, preserving evidence of the original craftsmanship.
For complex cornices, architraves, keystones, or window surrounds, take careful templates from intact sections. Use these to produce trial pieces, then refine the arrises, curves, and proportions on site.
Your material sourcing should favour compatible lime-based mortars, cast stone, timber, or other historically appropriate materials, selected for workability and durability. Secure new sections mechanically where necessary, while keeping fixings discreet.
Match interfaces precisely, allow adequate curing, and document every intervention for future maintenance. Don’t erase tool marks or maker’s evidence that contributes to the façade’s character.
Match Stucco Texture and Colour
Match the stucco’s texture and colour only after the underlying repairs have cured sufficiently, using sheltered original areas as reference rather than relying on freshly cleaned surfaces.
Record the historic surface’s tone in varied light, noting how age, aggregate, and weathering influence its appearance.
For reliable Color matching techniques, prepare small lime-based sample panels and compare them beside intact sections after drying. Adjust pigment gradually; a perfect wet match may dry too pale or dark.
Use Texture replication methods that reflect the Georgian finish, whether lightly floated, ruled, or subtly stippled.
Apply the trial mix across the repair, feathering its edges into surrounding stucco without blurring surviving tool marks.
Let each sample weather briefly before approval.
Keep samples, pigment ratios, and application notes for consistent work across the façade.
Maintain Stucco, Drainage, and Finishes
You’ll protect historic stucco by inspecting surfaces regularly and repairing cracks with compatible materials.
Keep gutters, downpipes, and drainage paths clear so water doesn’t saturate the façade.
Maintain limewash or other finishes carefully, preserving their breathability and traditional appearance.
Maintain Stucco Surfaces
Regular maintenance preserves a Georgian stucco façade’s texture, color, and historic character. Inspect the surface twice yearly, noting hairline cracks, hollow-sounding areas, staining, flaking, and biological growth. Photograph each defect and compare changes over time.
Brush away loose dust with a soft natural-bristle brush; don’t use abrasive pads, pressure washers, or harsh chemical cleaners that can erode the finish. Test any cleaning method on an inconspicuous patch first, then work gently from the bottom upward to prevent streaking.
Repair minor cracks with a compatible lime-based mortar, matching the original aggregate, texture, and permeability. Avoid hard cement patches, which trap moisture and accelerate failure.
Choose Eco friendly materials with documented conservation performance, and consult a specialist when damage is extensive. Record every intervention to support historical accuracy and future stewardship.
Manage Drainage and Finishes
Protecting the stucco also means controlling the water that reaches it and selecting finishes that let the wall breathe. Inspect gutters, valleys, downspouts, and splash zones; clear blockages and repair leaking joints before moisture enters the masonry. Confirm that drainage systems discharge well away from the foundation, without staining or eroding the façade.
Check flashings around roofs, chimneys, and openings, and renew failed seals with compatible materials. Let repaired stucco cure fully before applying coatings. Choose breathable limewash or mineral paint rather than impermeable acrylic films that trap moisture and accelerate failure.
Match historic color and sheen through discreet test panels. Use careful finishing techniques: brush or spray evenly, preserve tooling marks, and avoid covering evidence of earlier craftsmanship. Record products, colors, and maintenance dates for future stewards.
Conclusion
Restoring Georgian stucco proves that durability doesn’t require sacrificing authenticity. If you survey risks carefully, diagnose movement and damp before patching, and choose breathable lime materials, you’ll protect both the wall and its historic character. Remove failures gently, repair masonry first, and recreate mouldings through measured observation rather than guesswork. Finally, match texture, manage drainage, and inspect regularly. Your methodical care won’t merely beautify the façade; it’ll extend its life while preserving Georgian elegance.

