

Many Georgian townhouses retain original plaster cornices and ceiling roses that are over 200 years old, yet small alterations can obscure their proportions and detail. To recreate them authentically, you’ll need to identify the period style, measure surviving work, and choose compatible lime-based materials. Careful mould-making, breathable fixings, and reversible finishes will protect both new and historic fabric—but the most important decisions begin before any plaster is cast.
Key Takeaways
- Study surviving Georgian examples, pattern books, and regional details to select restrained, symmetrical cornice and ceiling-rose designs.
- Measure existing mouldings, room proportions, ceiling height, and architectural axes before creating accurate profiles, templates, or scaled drawings.
- Use compatible lime plaster, plaster reinforcement, and breathable materials matching the original fabric’s hardness, colour, and porosity.
- Prepare sound, dry surfaces, establish level setting-out lines, and repair cracks or movement before installing mouldings and roses.
- Fix sections securely with compatible plaster adhesive or discreet mechanical supports, then finish joints and details subtly without over-restoration.
Recognise Authentic Georgian Cornice Styles
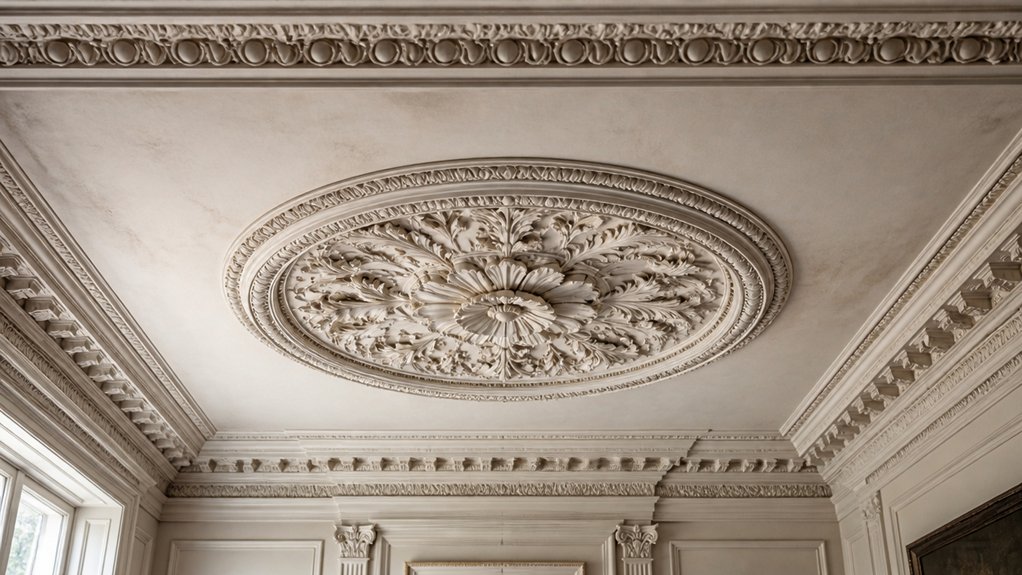
Authentic Georgian cornices are recognised by their disciplined proportions, crisp linear mouldings, and restrained classical ornament, rather than by elaborate Victorian decoration. When you assess a surviving profile, look for a clear progression from wall to ceiling: a narrow fillet, curved cove or cyma, and measured fascia, often enriched with dentils, egg-and-dart, or simple foliage.
You’ll usually find shallow relief, sharp arrises, and symmetrical repetition formed in lime plaster. Historical significance rests in these details, which reflect eighteenth- and early nineteenth-century taste, craftsmanship, and room hierarchy.
Regional variations matter, too: London work may appear particularly refined, while provincial examples can use broader sections or locally favoured ornament. Compare adjoining rooms, retain original fragments, and record dimensions before commissioning a replacement.
Don’t substitute later, heavier Victorian profiles where conservation requires Georgian accuracy.
Choose Georgian Ceiling Rose Designs
Choose classic Georgian motifs such as radiating foliage, moulded bands, and restrained geometric detail.
You’ll achieve a convincing result by matching the ceiling rose’s diameter, depth, and ornament to the room’s scale and existing cornice profile.
Preserve the historic character by selecting a design that complements, rather than competes with, the surviving plasterwork.
Classic Georgian Motifs
When selecting a Georgian ceiling rose, look for restrained symmetry, crisp foliage, and classical details such as egg-and-dart borders, acanthus leaves, or radiating petals. These motifs reflect the Historical context of Georgian interiors, when plaster ornament drew on Greek and Roman precedents while expressing Enlightenment ideals of order and refinement.
Acanthus conveys enduring classical authority; shells and husks suggest natural abundance; pearl strings and dentils provide disciplined edging. Your choice should preserve this Cultural significance rather than imitate decoration generically.
Examine surviving examples, pattern books, and local architectural details to identify authentic regional character. Prefer hand-run or carefully cast plaster with sharp, legible relief, and avoid exaggerated Victorian flourishes.
If an original rose survives, document its profile, tooling, and paint layers before commissioning a compatible reproduction.
Proportional Design Selection
Once you’ve identified suitable Georgian motifs, match the ceiling rose to the room’s scale and architectural hierarchy. In a compact parlour, choose a restrained centrepiece whose diameter leaves a generous ceiling margin. A grand stair hall can support deeper relief and layered mouldings.
Let the rose relate to the cornice projection, door-case proportions, and chandelier canopy, rather than selecting an isolated pattern. Study the historical context: early Georgian interiors often favoured crisp foliage, radiating paterae, and disciplined symmetry, while later examples permitted richer ornament.
Measure the ceiling, record existing details, and use a scaled drawing or template before commissioning. Specify lime plaster where historic fabric demands compatibility, and assess material durability against humidity, impact, and future maintenance.
Avoid oversized reproductions that distort the room’s hierarchy. Your selection should appear original, legible, and appropriately subordinate to the architecture.
Match Cornice Sizes to the Room
Assess your room’s length, width, and ceiling height before selecting a cornice profile.
Balance its projection and ornament against the room’s scale, so the replacement respects Georgian proportion without appearing overstated.
You’ll achieve a more convincing result by coordinating the cornice depth with the ceiling height and preserving the building’s existing character.
Assess Room Dimensions
Room proportions should guide your choice of Georgian cornice, since an oversized profile can overwhelm a modest interior while a shallow one may disappear in a lofty room.
Measure the room’s length, width, and finished ceiling height, recording irregularities in older buildings. Note chimney breasts, alcoves, beams, and later partitions, as these affect the run and visual reading of the plasterwork.
Consider Room lighting: daylight from tall sash windows and the position of chandeliers can reveal shadows, moulding depth, and surface imperfections.
Review furniture placement too, because tall cabinets, mirrors, and curtain headings may sit close to the cornice and influence its apparent scale.
Compare your measurements with historic pattern books or surviving local examples.
Before ordering, make a full-size profile sample; it’ll help you judge the moulding accurately onsite.
Balance Cornice Proportions
Balance the cornice’s projection, height, and visual weight against the room’s finished ceiling height and overall proportions. Choose a restrained profile for a modest chamber; reserve deeper, more layered work for broad rooms with generous wall planes. Don’t let a heavy cornice overwhelm narrow spaces or make a shallow room feel compressed.
Study surviving Georgian interiors nearby, since historical context can reveal locally appropriate moulding scales and detailing. Consider architectural influence, including classical orders, regional builders’ practices, and the house’s original status, before selecting a pattern.
Measure the intended shadow line and return depth, then compare a full-size profile drawing against the walls. Preserve evidence where possible, and avoid enlarging details merely to create drama. A sympathetic scale will look convincingly original rather than newly imposed.
Coordinate Ceiling Height
How high is the finished ceiling, and what proportion will the cornice occupy beneath it? Measure from the completed floor level to the ceiling plane, allowing for plaster build-up, coving shadow lines, and any later floor coverings.
In a modest Georgian room, an over-scaled profile can reduce apparent height; a shallow cornice may look historically implausible in a grander interior. Use surviving fragments, archival drawings, and comparable houses to establish an appropriate projection and drop, rather than choosing by catalogue alone.
Historical accuracy depends on relating the cornice to the room’s width, window heads, doors, and ceiling height. Confirm dimensions on site before ordering or casting.
Careful material sourcing also matters: match the original plaster composition and density so the finished profile takes light and ages consistently with the fabric.
Choose Plaster, Moulds, and Fixings
Choose a fine casting plaster compatible with the original cornice, using a slower-setting formulation when you need time to fill detailed moulds cleanly.
Check the plaster composition against surviving fragments, matching hardness, colour, and porosity rather than choosing the strongest product. Excessively hard repairs can damage historic fabric.
Treat mould selection as a conservation decision. Use a flexible silicone mould for repeated casts and intricate ornament, or a traditional rubber-and-plaster case where authenticity and crisp undercut detail matter.
Take a profile from an undamaged section, never from a decorative feature you could harm. Seal porous moulds lightly, then apply release agent sparingly so you preserve fine arrises.
Choose stainless-steel screws, corrosion-resistant washers, and compatible mechanical fixings. Select lengths that secure the casting without penetrating vulnerable features, and keep every component removable where practical for future conservation.
Prepare Walls and Ceilings for Plasterwork
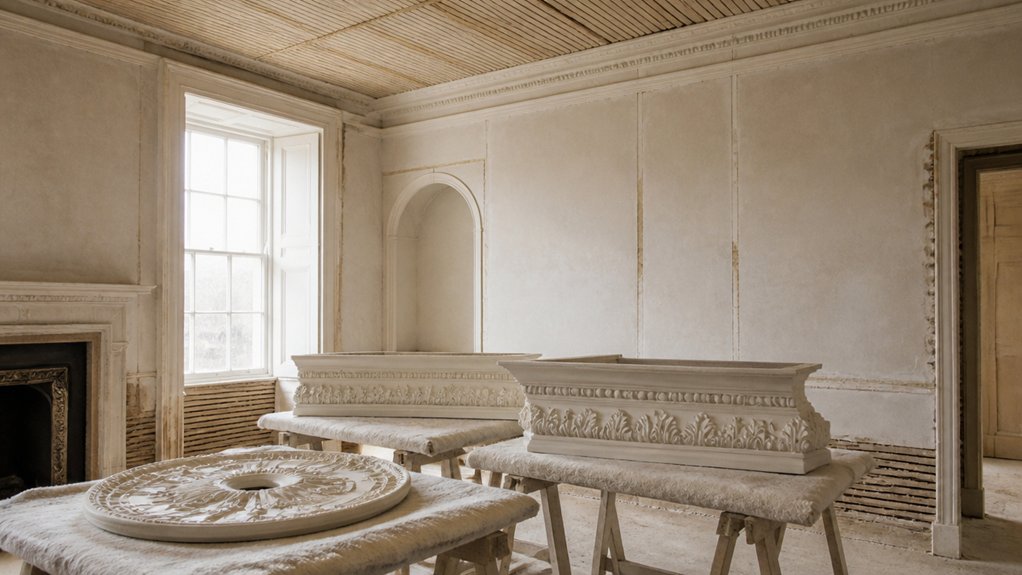
Before fixing the cornice, assess the wall and ceiling surfaces for damp, friable plaster, movement, and previous repairs.
Repair cracks and damage with compatible materials, retaining sound historic fabric wherever possible.
Establish accurate level reference lines so the new plasterwork follows the room’s original geometry.
Assess Surface Condition
Evaluating the wall and ceiling surfaces is the first safeguard against damaging historic fabric or compromising the new Georgian cornice. Begin by identifying the substrate: lime plaster, gypsum, lath, masonry, timber, or a later lining.
Check for moisture staining, salt deposits, friable finishes, hollow-sounding areas, and previous alterations, recording findings with photographs and measured notes. Don’t assume a modern coating will accept traditional plaster or provide adequate adhesion.
Test discreetly for paint layers and soluble distemper, and consider whether removal could disturb significant decorative evidence. Assess flatness, porosity, suction, and load-bearing capacity before specifying surface preparation.
Your material selection should remain compatible with the existing building, favouring breathable lime-based systems where appropriate. Consult a conservation professional if hidden construction, unstable finishes, or historic paint schemes complicate the assessment.
Repair Cracks and Damage
Once you’ve identified the substrate and recorded its condition, repair defects before installing the cornice. Open hairline cracks slightly, remove dust, and fill them with a compatible lime-based repair mortar.
For wider or moving cracks, investigate the cause first; stabilise loose masonry, address moisture, and consult a conservation professional where structural movement persists.
Re-secure detached lath with appropriate fixings, replacing only sections that have failed. Patch missing plaster in layers, allowing each coat to cure, and finish flush without obscuring surviving historic detail.
Avoid hard cement repairs, which can trap moisture and create stress at the junction between old and new work. Match the existing substrate’s porosity and strength, supporting both historical accuracy and a durable modern installation.
Keep repaired areas clean, sound, and fully dry before applying adhesive, grounds, or new plasterwork.
Establish Level Reference Lines
With the repairs cured and the surfaces dry, establish level reference lines to control the cornice’s position and preserve the room’s historic proportions. Set a laser level or water level around every wall, checking it against surviving plaster, door heads, window reveals, and any historic paint line.
Don’t assume the floor or ceiling runs true; record variations before choosing the datum. Mark a continuous, discreet line below the intended cornice, then transfer key measurements to each corner and opening.
Use a straightedge to identify bowed backgrounds and note areas needing packing or further preparation. Historical accuracy depends on following the original geometry, not imposing modern uniformity.
Confirm the line with your plasterer before installation, and guarantee Material selection, including fixing methods and bedding plaster, suits the existing fabric.
Measure and Form Georgian Cornice Profiles
To measure and form a Georgian cornice profile, begin by recording the existing moulding’s projection, height, returns, and sequence of ovolos, hollows, and fillets before removing any material. Photograph each elevation, then make a perpendicular profile rubbing or trace on stable film.
Transfer those measurements to a full-size profile drawing, marking spring lines, arrises, and fixing edges. Check several locations; settlement or previous repairs may have altered the section.
For historical accuracy, distinguish original work from later additions and retain an undisturbed sample where possible. Select compatible plaster, gauze, and reinforcement through careful material sourcing, matching the existing substrate rather than introducing a harder mix.
Shape a zinc or hardwood template to the drawing, refining its arrises with files. Keep records so every replacement remains reversible, legible, and proportionate.
Cast and Shape Georgian Ceiling Roses
After recording the cornice profile, turn to the ceiling rose as a separate but related plaster element. Document its diameter, projection, ornament, centre point, and relationship to the room’s setting out.
Use historical inspiration from surviving Georgian examples, pattern books, and archival photographs. But distinguish original evidence from later alteration.
For material selection, choose a compatible fine casting plaster and clean, stable reinforcement. Avoid cement-rich mixes that can trap moisture or create damaging stiffness.
Prepare a flexible mould from a carefully repaired model, retaining crisp leaf, bead, and ribbon details without exaggerating softened edges.
Cast in controlled layers, embedding discreet reinforcement where necessary.
Once cured, release the rose gradually, trim its perimeter, and refine seams with matching plaster.
Record every alteration so the finished ornament remains legible, reversible, and faithful to the historic design.
Install Georgian Cornices and Ceiling Roses
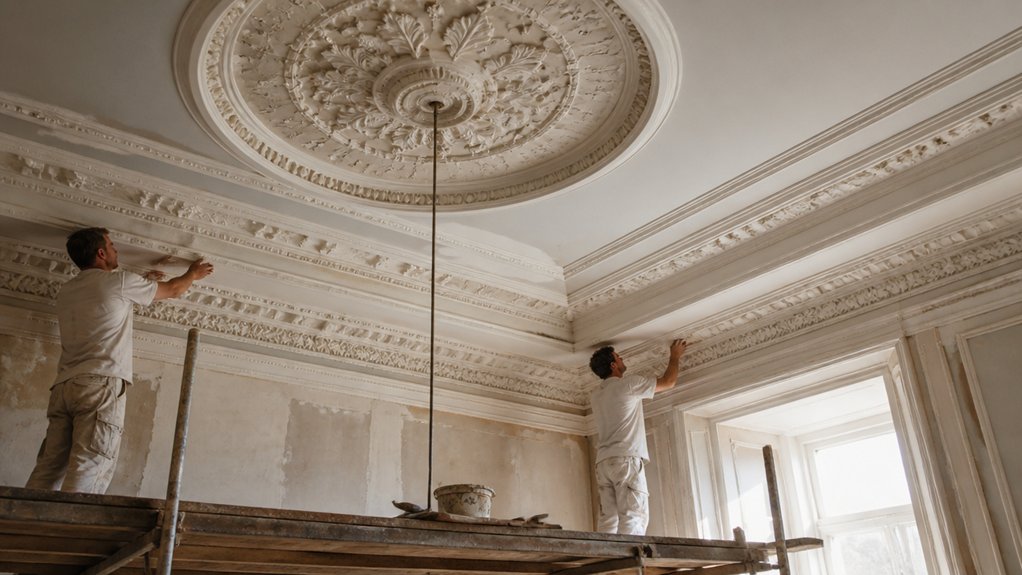
Once the cornices and ceiling rose have cured fully, install them on sound, properly prepared surfaces, preserving the room’s historic setting out and avoiding unnecessary loss of original fabric.
Confirm the Historical context before marking positions: Georgian mouldings should align with existing architectural axes, chimney breasts, doors, and windows.
Set out with a level, straightedge, and templates, recording measurements so the work remains reversible.
Fix cornice lengths with compatible plaster adhesive or stainless-steel mechanical supports where weight or substrate conditions require them.
Bed joints tightly, support each section until secure, and avoid cement-based products that can trap moisture or damage soft masonry.
Centre the ceiling rose from the room’s principal geometry, not from an inaccurately placed modern fitting.
Use discreet preservation techniques, protect surrounding finishes, and document every intervention for future custodians.
Repair Joints and Restore Georgian Details
With the joints fully set, inspect each seam for shrinkage, open gaps, or misalignment before making repairs. Protect surrounding plaster, then rake loose material from the joint without widening sound edges.
Dampen the exposed area lightly and press in a compatible lime-based filler, building it in thin lifts to limit cracking. For deeper voids, use matching plaster or fibrous reinforcement rather than rigid modern filler.
Re-form arrises with a straightedge, and reproduce leaf, egg-and-dart, or bead details with fine tools while the material remains workable.
Study surviving sections for Historical context, including tool marks and profile changes, before replacing losses. Your preservation techniques should remain reversible and visually restrained.
Don’t over-model damaged ornament; retain honest evidence of age and distinguish new work subtly from historic fabric.
Paint and Finish Georgian Plasterwork
Before applying colour, let the repaired cornice dry fully and confirm that its surface is sound, clean, and free from salts or dust. Brush away loose particles, then apply a compatible, breathable primer or thin limewash, depending on the plaster and existing finish.
Don’t seal historic fabric beneath impermeable modern coatings, which can trap moisture and cause blistering or salt damage. Choose historically appropriate, muted tones, and test samples beside surviving paint before committing.
Build colour in several thin coats, allowing each to dry evenly; avoid flooding crisp moulded details. Modern paint techniques can improve consistency, but they shouldn’t imitate age artificially or obscure tool marks.
Where evidence supports it, use contemporary finishing options sparingly, selecting vapour-permeable products and reversible treatments. Protect gilding, shadows, and tonal contrasts that define Georgian craftsmanship.
Conclusion
By studying Georgian proportions, selecting sympathetic lime plaster, and setting out every moulding with care, you’ll create cornices and ceiling roses that feel authentically rooted in their room. Keep your fixings breathable, your repairs reversible, and your finishes restrained. When you clean, cast, cut, and colour-match thoughtfully, you’ll protect historic character rather than impose novelty. With patient craftsmanship and regular review, your plasterwork will remain a graceful, durable, and defensible part of the building’s story for generations.

